5 Frugal Holiday Crafts Made From Aluminum Drink Cans
I like to craft with aluminum drink cans, and if you do too, I have five fun and unique Christmas crafts for you to try. Each one is made from a different part of the aluminum can for a variety of different looks.
Since I save all of our aluminum beer and soda cans for craft projects I have my own system for breaking down the cans. Once they are broken down, they don’t take up so much space, and I always have the aluminum parts ready for crafting.
If you would like to know how I break down aluminum cans into metal sheets, rings, domes, and tabs watch the video below.
Project 1 – Christmas Tree
For this first project, I’m using the scrap pieces from the can ring. You will also need the following.
- Metal Tape
- Scissors
- Scrap Cardboard
- E6000 Glue
- Hot Glue
Step 1 – Cutting Aluminum Scraps
Since I make a lot of projects from drink cans I have a pretty big stash of partially broken down cans. Normally, I cut the scrap pieces off the ring of the can and discard them, but these small pieces are perfect for this tree project.

It takes quite a few of these pieces even for a small tree like the one I am making and you don’t have to use just the scrap pieces. You can cut small rectangles from the metal sheet pieces to use as well.
To finish shaping each piece, I used a pair of scissors to round off one end.

Step 2 – Cutting and Shaping Cone

To make the tree shape, I used an old cereal box to make the base, but any scrap cardboard will do. You need a square corner and something to draw an arc with to make the sides equal lengths. I used a string and a marker and added some tape to secure my pieces before drawing the arc. Once the shape was cut out, I applied some hot glue to make the cone. The cardboard is a little stiff and doesn’t roll easily but with a little determination, it can be shaped into a cone. And you don’t have to worry if your shape isn’t perfectly smooth.
Step 3 – Assembling The Tree

To attach the pieces to the cone, I used some metal tape and started at the bottom of the cone and worked my way toward the top, covering the tape with the metal pieces as I went along.

I started this project thinking that I could just use all the different colors of scrap pieces but once I got a couple of rows onto the cone, I decided it looked too much like a party hat. So, I switched to only green pieces, and I had to cut up some of the aluminum sheets to have enough green pieces.

Step 4 – Finishing

To finish the Christmas Tree, I cut another small cone from the aluminum sheet and added a little crystal to the cone with some E6000 glue to make a tree topper.

Project 2 – Chain Garland
- Aluminum Drink Cans (Rings)
- Metal Tape
- Tin Snips
- Scissors
- Ruler
- Pencil / Pen
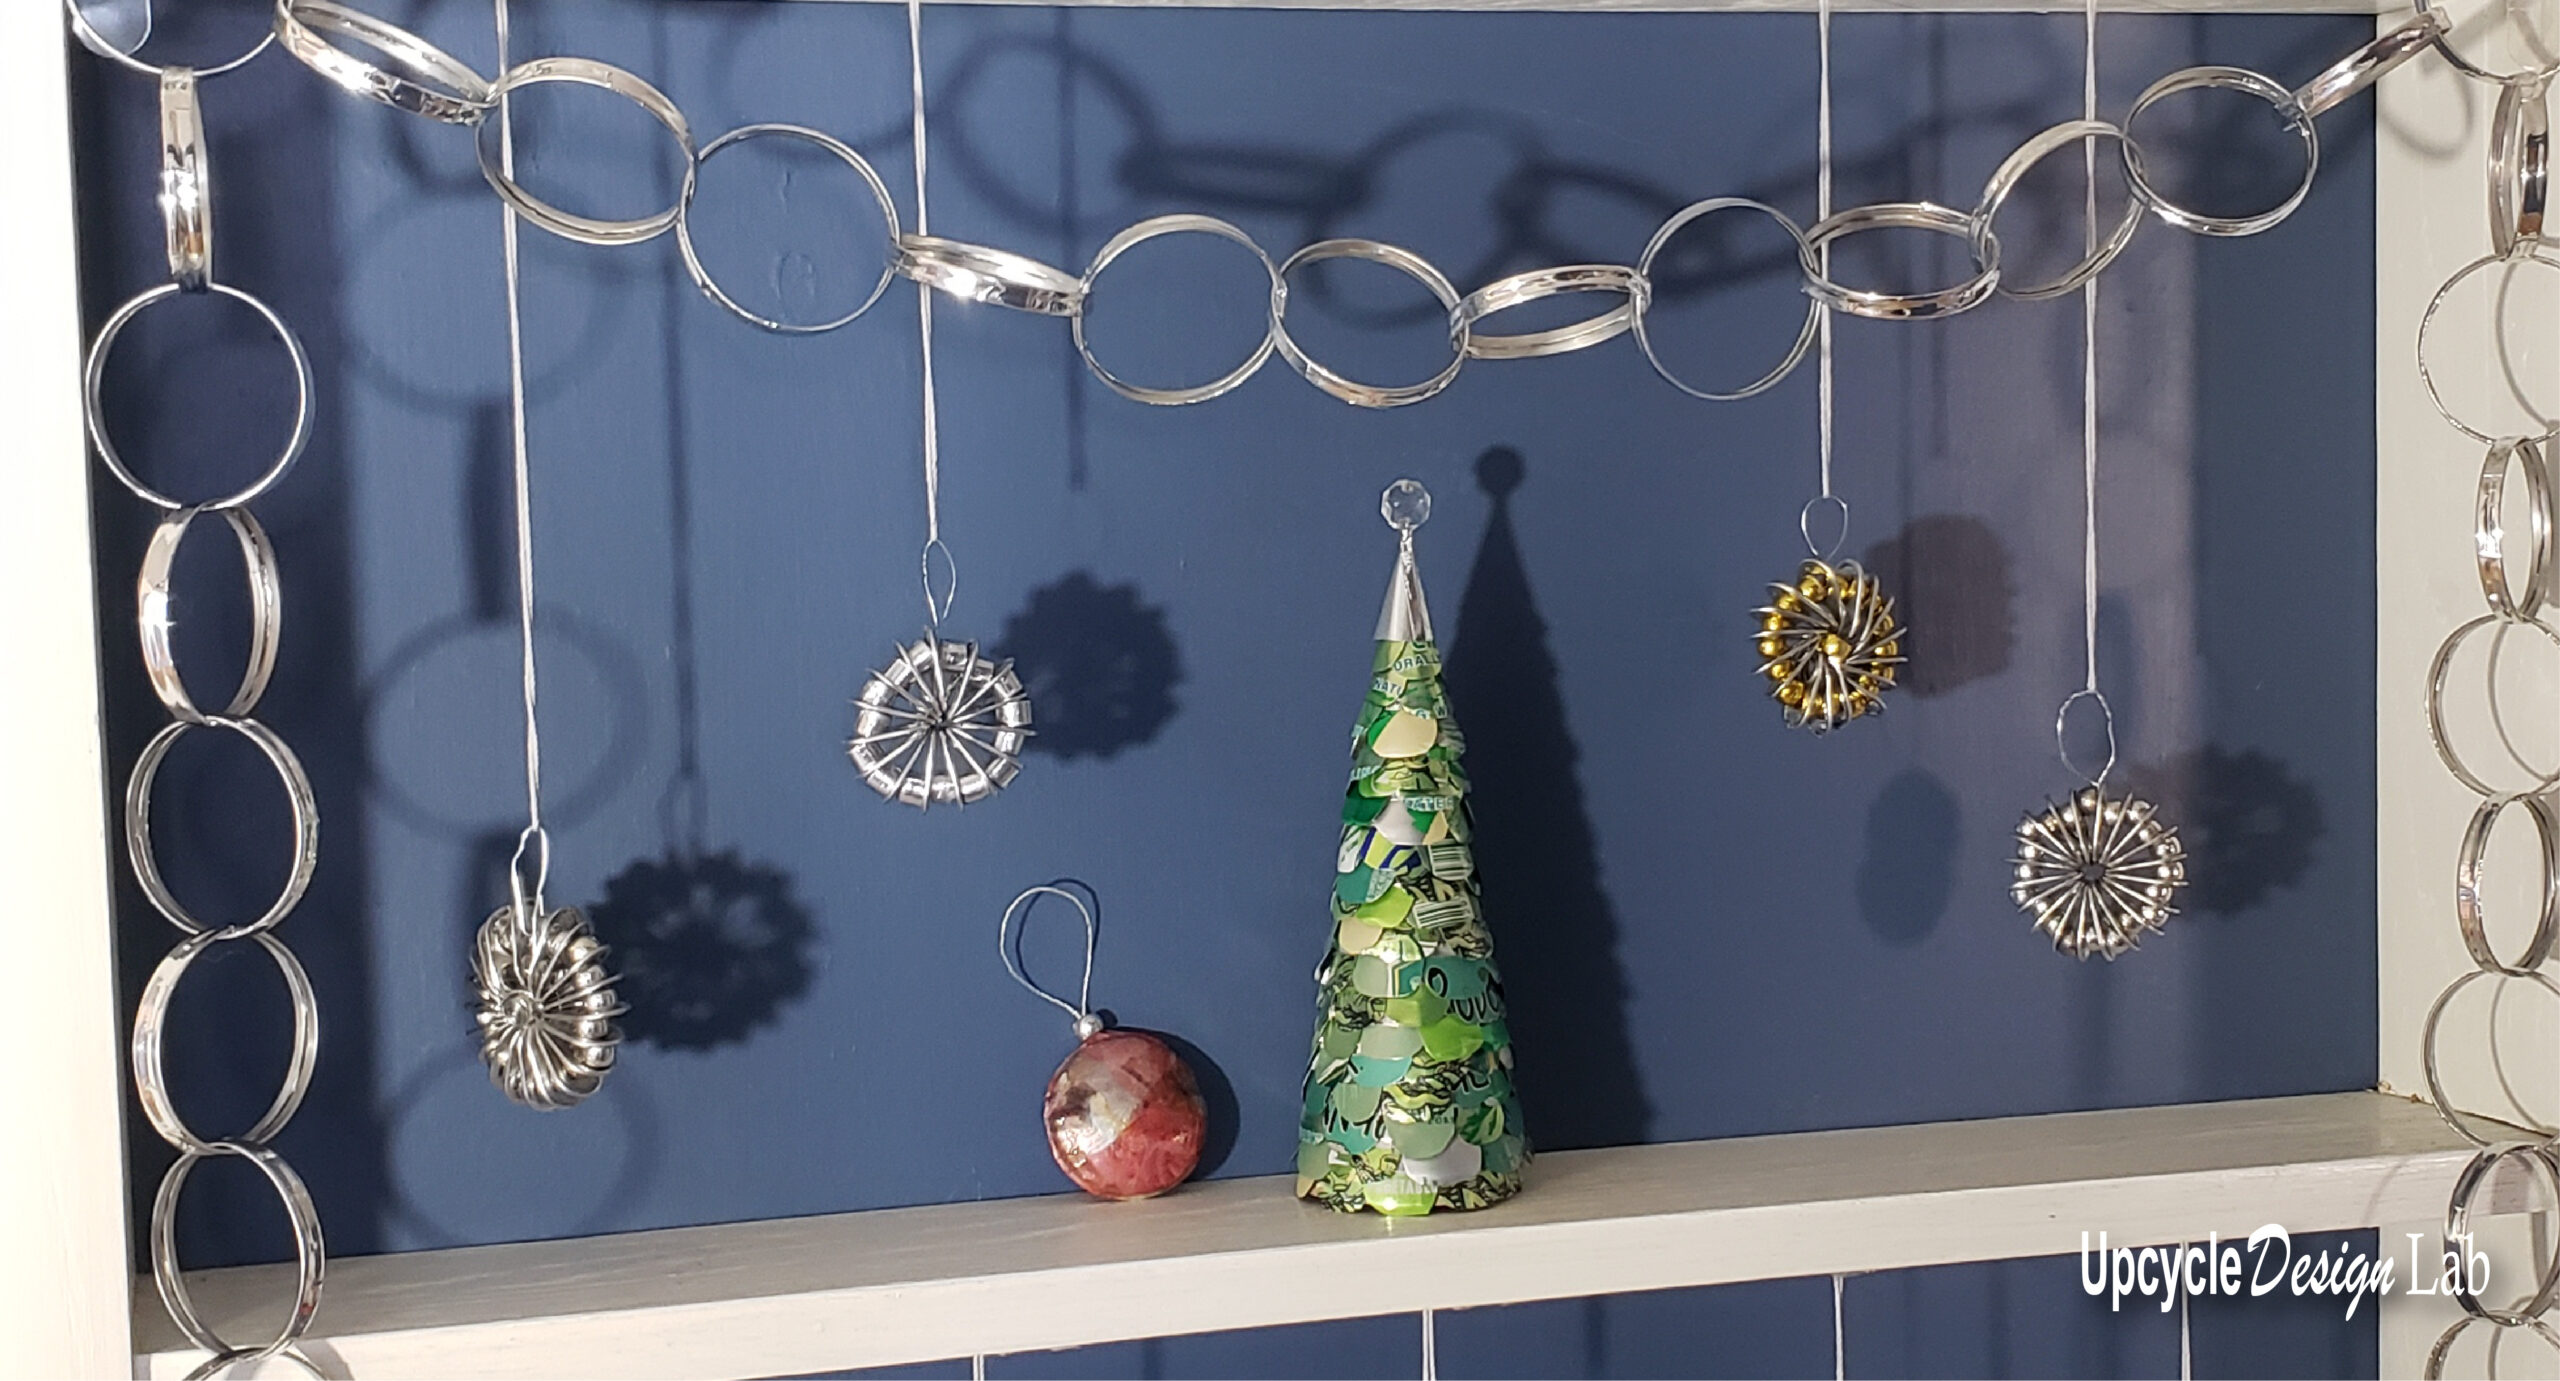
Project number two is a giant chain garland made from soda can rings. This project takes a lot of rings to make a garland long enough to go around a Christmas tree, so you will want to save a lot of cans if you decide to do this project.
Step 1 – Preparing Rings

This step is the same process that was used in the previous project. To remove the excess metal from the ring, cut slits up to the ring about 3/4 of an inch apart and push each tab back and forth to break it loose from the ring.
Step 2 – Preparing Tape

Next, cut a length of tape long enough to wrap around the rings. About 7 inches long. Next, mark the tape in 1/4 inch sections and cut the tape into strips. The metal tape has a paper backing, so it is easy to mark and cut.
Step 3 – Preparing O Rings

There are two types of rings to make this chain. The first type is what I am calling O rings. To start the chain, you will need two O rings. I am using two soda can rings and one 1/4 inch strip of metal tape to make each O ring. You want to hold the rings together so that the rough edges face each other in the middle and the finished smooth edges are on the outside.
To attach the pieces together, I like to peel back a small section of the paper from the tape and work my way around the rings, removing the paper backing in sections rather than all at once.
Step 4 – Making C Rings and Assembling Chain

To connect the two O rings, I made what I call a C ring by cutting two soda can rings with my tin snips and looping them through both O rings. You want to be sure the rough edges of the C rings face each other.

Then, use a small piece of metal tape to hook the ends back together before taping the rings together with the metal tape. I also like to offset the seams in each of the rings to make the connections more stable, which also helps keep the ring in a more uniform shape.

Step 5 – Repeat
Continue making O rings and assembling the chain with C rings until you reach your desired length.

Project 3 – Pull Tab Ornaments
- Aluminum Drink Cans (Pull Tabs)
- 32 gauge silver wire
- Scissors
- Silver Pony Beads
For the next project, I am going to be making a Christmas tree ornament from some pull tabs.
Step 1 – Stringing

I am starting with a long strand of 32 gauge silver wire, which is pretty fine wire. You can use heavier wire, but you want something flexible and easy to work with. You also need 20 pull tabs and 20 silver pony beads. To start stringing, slide one pull tab onto the wire through the large end that was attached to the drink can. Next, add one pony bead and another pull tab. I like to make sure that all the pull tabs are facing the same direction. Continue alternating pony beads and pull tabs until all twenty have been strung.
Secure the ends by pulling the wire into a ring and twisting it several times to lock it in place.

Step 2 – Shaping

Cut a second piece of wire about 12 inches long and string it through the opposite hole in the pull tab, working around the shape until all the pull tabs have been threaded. Pull the wire ends tight and twist the ends. This will pull the tabs into the center to shape the ornament.

Step 3 – Finishing
To finish the ornament, weave the excess wire through the shape to tie off the ends and make a loop to hang the ornament. You can experiment with beads in the center or wire coiling, use different beads, etc.

Project 4 – Decoupage Ornaments
- Aluminum Drink Cans (Bottoms)
- Metal Tape
- Ruler
- Scissors
- Pencil Pen
- Mod Podge
- Paint Brush
- Tissue Paper
- Embossing Tool
Step 1 – Prep Pieces

Each of these ornaments uses two can bottoms. To prepare the pieces, I am using a pair of tin snips to trim off the excess metal so that only the domed portion is left. I’m using a short piece of crochet thread tied in a loop to hang the ornament, and to hold all the pieces together; I cut a piece of metal tape 1/4″ wide and 7″ long.
Step 2 – Assemble Ornaments
To assemble, I start by taping one of the tails of the crochet thread to the metal tape, and then as I hold the two can bottoms together, I wrap the tape around, making sure to cover the seam and catch both of the aluminum pieces and the other tail of the crochet thread loop.

Then, I smooth the tape with my fingers and use the embossing tool to burn the tape to the aluminum.

Step 3 – Decorate
I’m using Mod Podge and some tissue paper to add some decoration. But you can also use paint, alcohol inks, sequins, glitter, and more to decorate these ornaments, so use your imagination and hopefully something from your craft stash.

Once your embellishments are sure and dry, the final step is to add a silver pony bead to the top and secure it with a little E6000 glue.


Project 5 – Small Square Gift Box
- Aluminum Drink Cans (Flattened Sheets)
- Scrap Cardboard
- Hot Glue
- Iron
- Parchment Paper
- Ruler
- Scissors
- Metal Tape
- Pencil / Pen
Step 1 – Make Box Frame

To start this project, I am using my ruler to draw the box pieces on a scrap of cardboard. This box will be a 3″ square, but you can also make smaller boxes. You can use any box template to create your own box. Just keep in mind that the maximum width of the aluminum is about 3 inches. Once the cardboard pieces were cut, I used my ruler and knife to score the fold lines.
Step 2 – Assemble Box

Next, I cut my flattened aluminum sheets into six squares, 3 inches by 3 inches. If you need some tips on flattening aluminum, I have a video on three different methods for flattening aluminum sheets that I will link to in the description. I’m using some hot glue to attach the aluminum to the cardboard because it is the fastest way to assemble this box.

I like pressing the pieces with a medium-hot iron to smooth the glue. If you do this, you will want to protect your iron with a piece of parchment paper to keep it from getting any excess glue on it, and lift the iron straight up and down so the pieces don’t move.

Once the glue has cooled, the box can be folded and glued together with the hot glue.

Step 3 – Finish

To finish off the box, I used 5/8″ strips of metal tape to cover the edges and seams and wider pieces of metal tape to cover the top tab pieces.

Happy Upcycling,
Cindy
Advertising Disclosure: Upcycle Design Lab may be compensated in exchange for featured placement of certain sponsored products and services or your clicking on links posted on this website


