
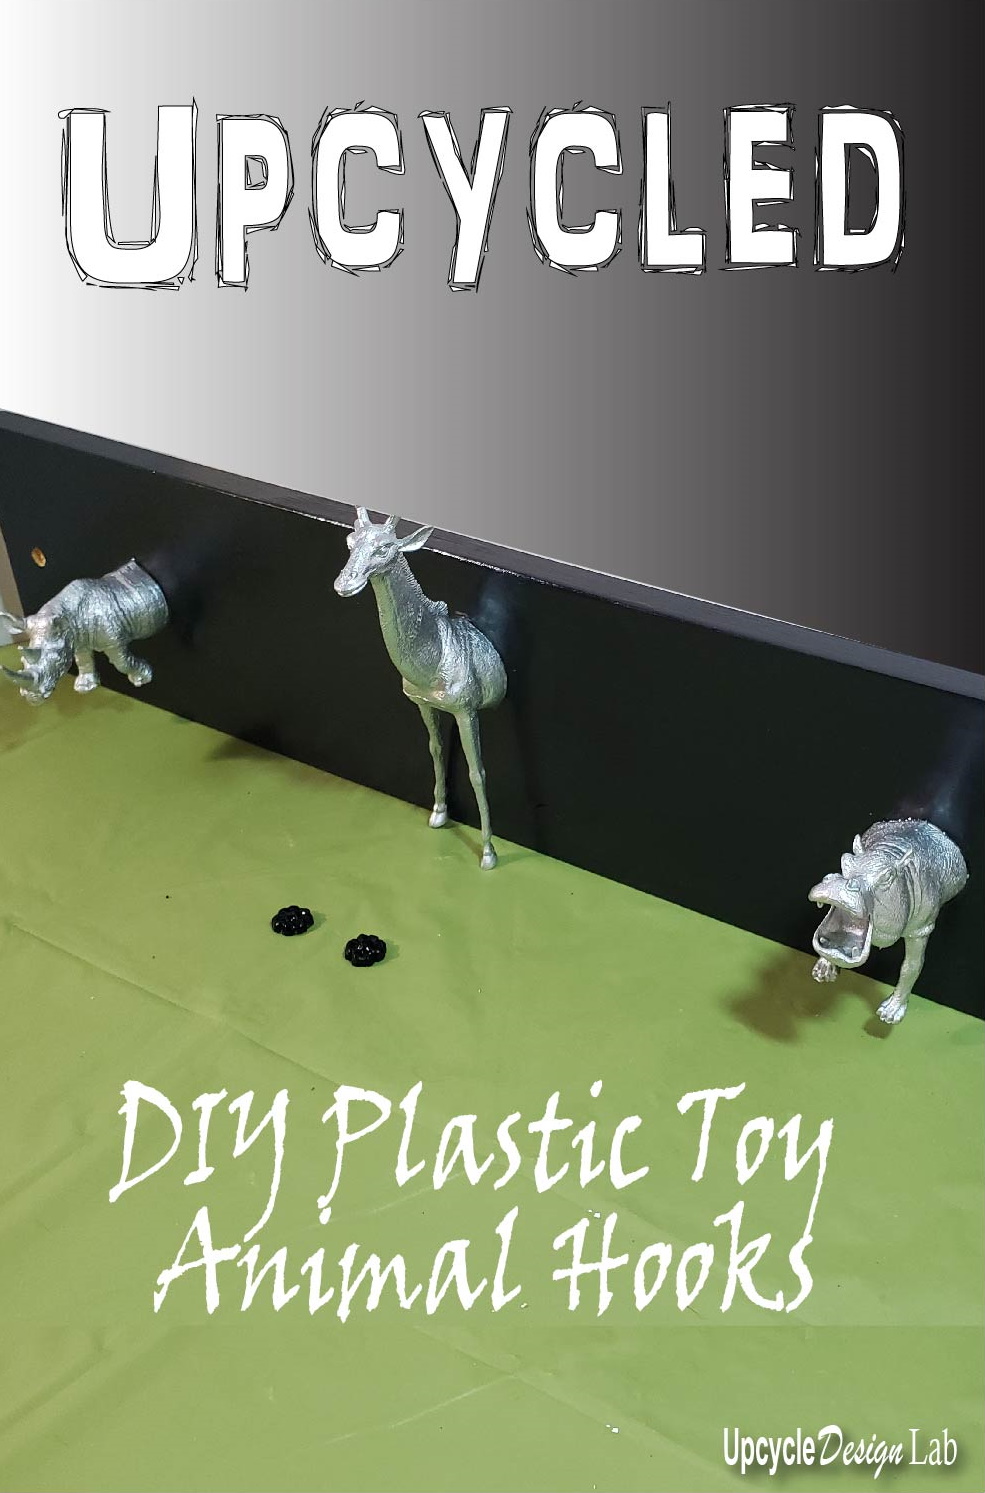
DIY Plastic Animal Hooks Some Do’s and Some Don’ts
Advertising Disclosure: Upcycle Design Lab may be compensated in exchange for featured placement of certain sponsored products and services, or your clicking on links posted on this website.
Hello and welcome to the Upcycle Design Lab.
What can I say about this project? I thought it would be easy. I was wrong. I have seen lots of pictures from other folks who have made this project but I wasn’t able to find a lot of details on how they made them.
Still, I thought all I had to do was cut some wood, drill some holes and attach the animal heads. Right? How hard could it be? Well, it was a little more complicated than I thought.
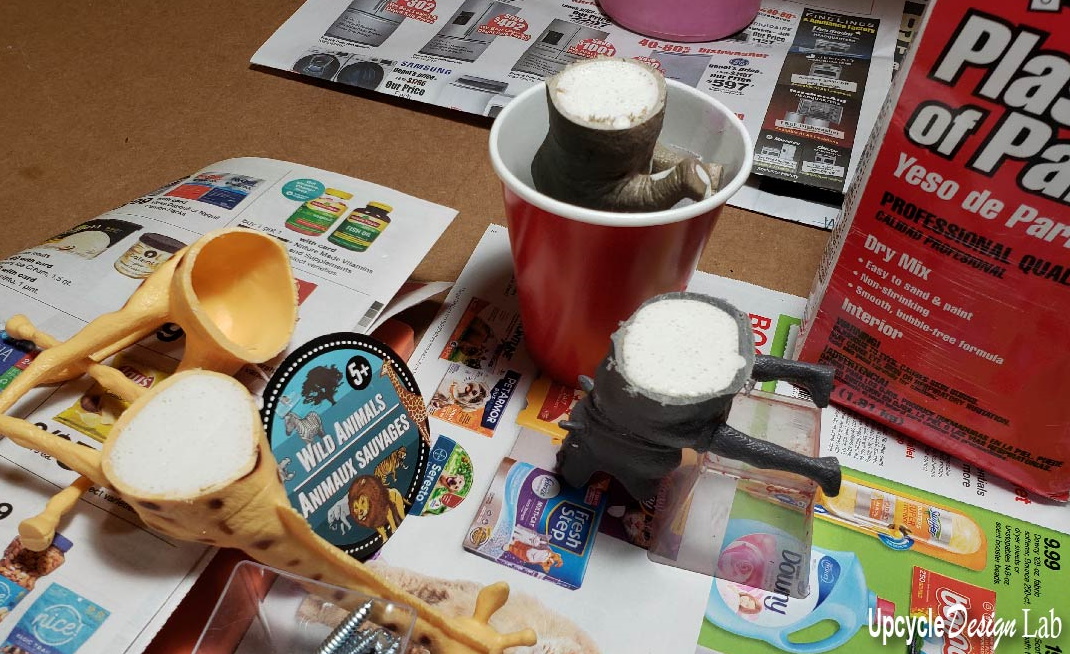
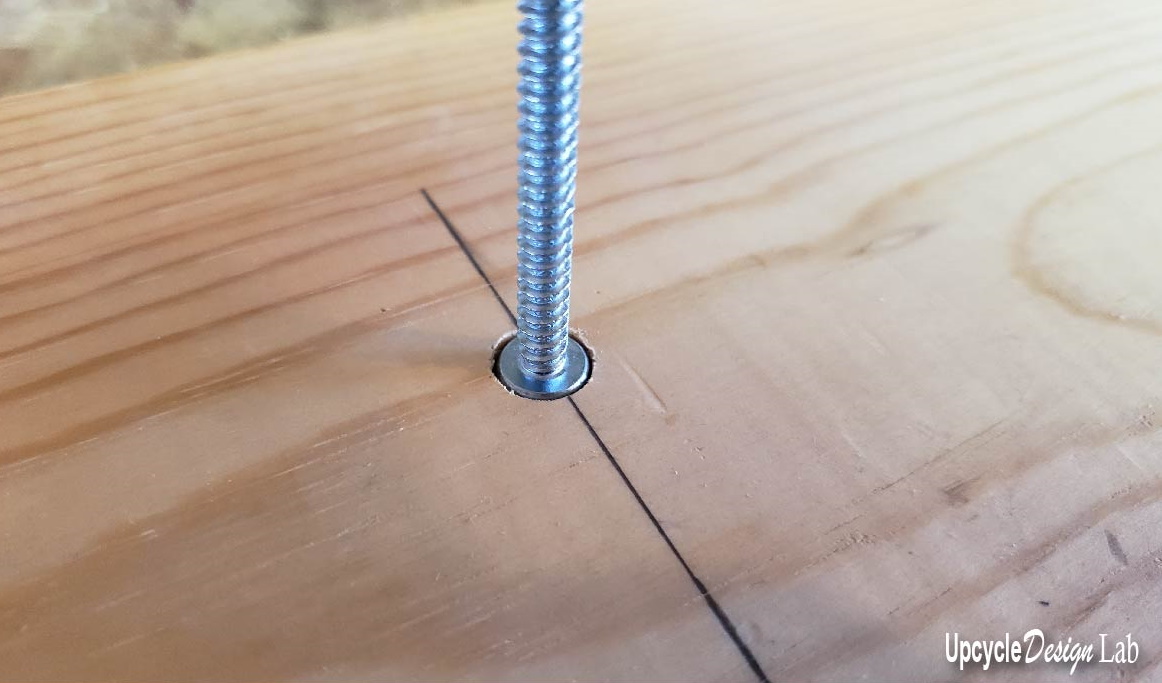
Problem number one. I wanted to make extra sturdy hooks so I planned to put screws through the back of a piece of wood and then into the animal. But as you may already know these plastic toys are hollow.

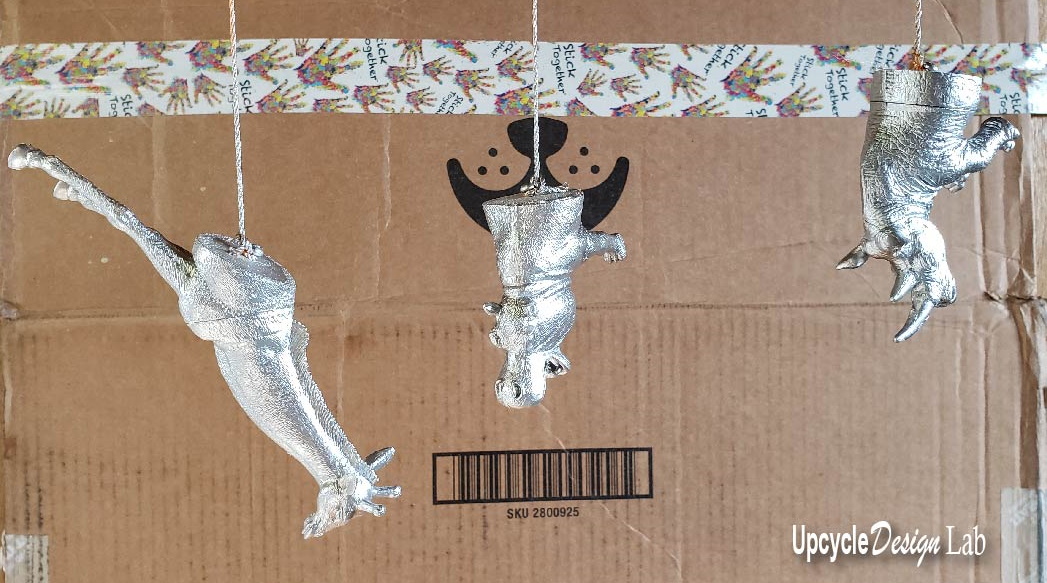
We used a miter box and saw to cut the animals in half. I am not going to lie. It made me feel a little guilty. Anyway, it all seemed to be going well and the hubby was helping me with the power tools cutting the wood and drilling the holes.
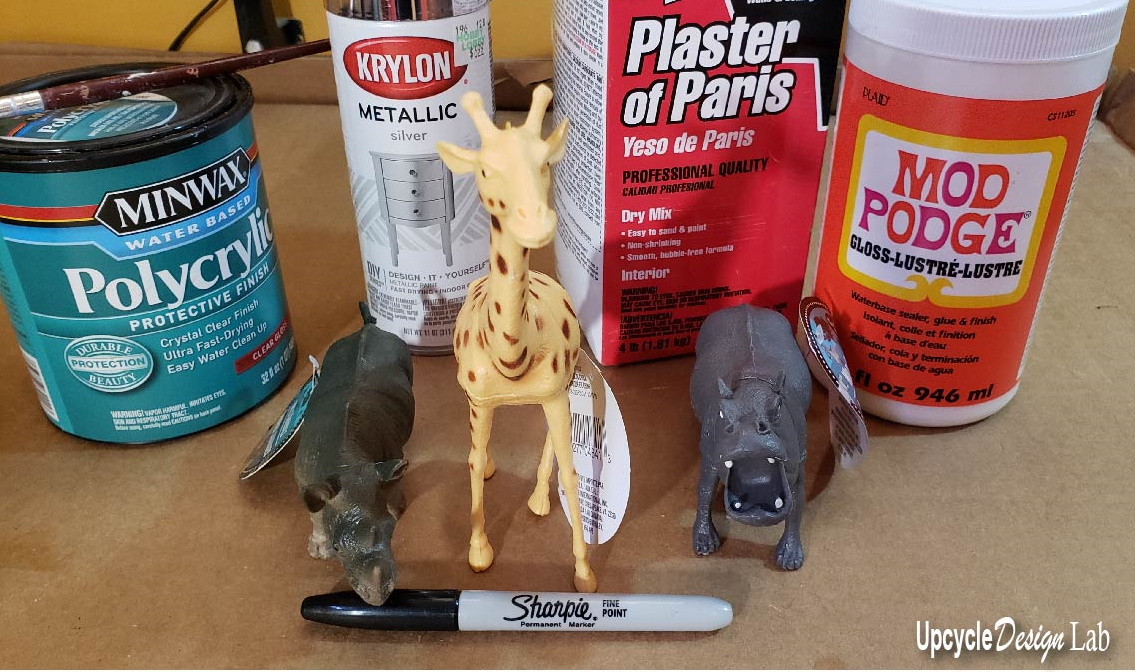
But then came the tricky part of filling in the animals. I came up with my own solution of plaster and Mod Podge to fill the insides which after several days of drying and lots of glue seems to be holding. But I am not sure I can fully endorse this process.
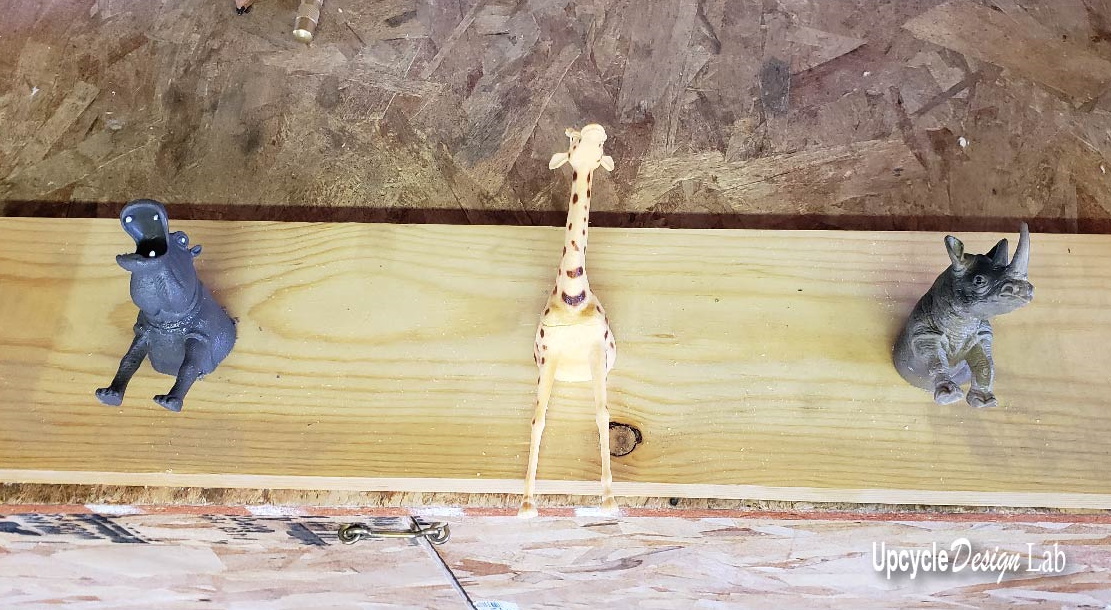
We drilled holes in the board with a regular drill bit and then used a spade bit to fit the screw heads so that they would be flush against the wall.
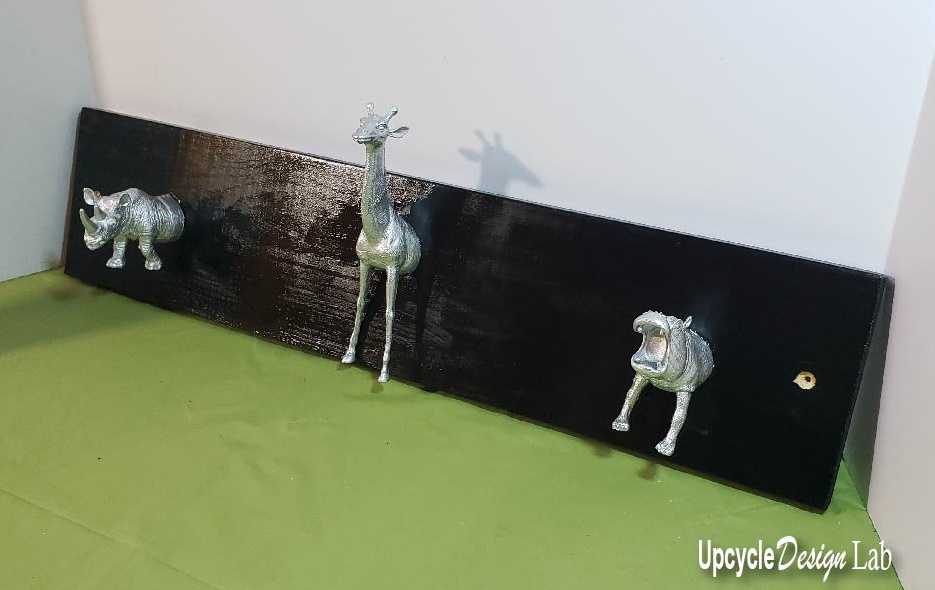
I sanded and painted the board black and then the animals were painted with silver spray paint.
The second problem was attaching the animals to the board. The plan was to drill a small hole in the center and then twist them onto the screws. But my plaster filling mix wasn’t dry or hard enough for that which was actually a good thing because if the screw isn’t good and straight the back of the animals won’t sit flush on the board. So we ended up just pushing the animals onto the screws and using some glue to hold them in place.
You can see find all the details in the video below.
It was kind of a roundabout way to get there but it seemed to work. We tested out the hooks with some heavy towels and they held. Of course, time is the real test. But I am feeling much more optimistic than I did in the middle of this project.
Happy Upcycling,

Advertising Disclosure: Upcycle Design Lab may be compensated in exchange for featured placement of certain sponsored products and services, or your clicking on links posted on this website.


Wow this sound like it was terribly complicated. I gotta watch the video yet too. But it looks good. I think I would have used quick-crete. Only problem is it would make it heavy and that might not be a good thing. But it would definitely dry quickly and hold up.
It was a little more complicated than it should have been. 🙂