DIY Pop Wall Art – Transforming Soda and Beer Cans Into Home Decor
I continue to be amazed by all the ways to craft with empty beer and soda cans. Today’s project was fun and easy to create, and I love how it turned out.
For this project, you will need a Cricut or another cutting machine capable of cutting metal sheets. If you don’t have one but have been considering purchasing a Cricut machine, I don’t think you will be disappointed. 🙂
I must confess that I waffled back and forth for several months about whether to invest in a cutting machine. And I still don’t know all the ins and outs of my machine. I think I was actually a little afraid of it, and at first, I didn’t use it that much.
But recently, I have been using it almost exclusively to cut aluminum sheets, and I am thoroughly enjoying all the intricate shapes that can be made from aluminum cans.
Supplies
- Cricut Maker Cutting Machine
- Your Choice of Silhouette SVG files
- Empty Drink Cans
- 5 x 7 Frame
- Glue Stick
- Double-sided Tape
- Painters Tape
- Craft Scissors
- White Cardstock
- Black Cardstock (or junk mail, old card, and black paint)
- Duct Tape – optional
Step 1 – Planning
This step is about your personal choice and the place to let your creativity shine. You can check out .svg files for sale on Etsy and other sites. If you have a subscription to Cricut Access, you can find many designs there as well. Or if you have the software and know how to make your own .svg files, you can really make the designs your own. I use Adobe Illustrator, but I am sure there are other software programs for this.
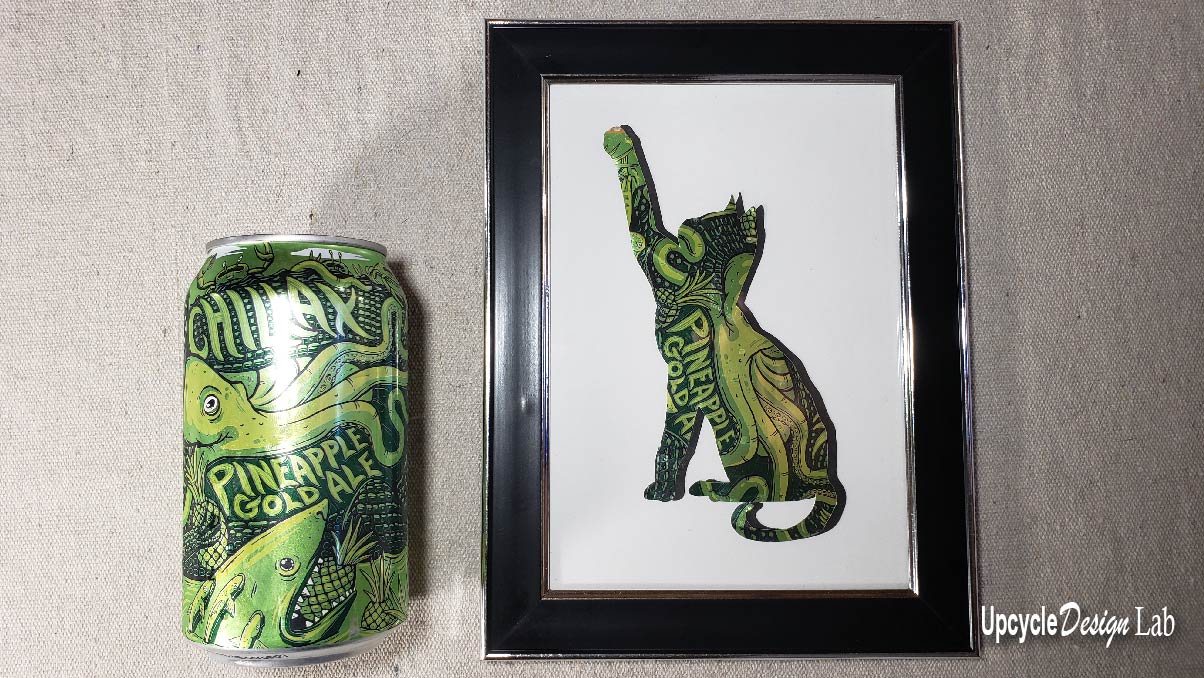
You will want to select shapes that look good as silhouettes for your art. I chose cat silhouettes because we are in the beginning stages of fixing up a room for our cats. Yes, we are “those” people. Not only do we have four large dogs that basically run the household we also have two cats that need their own room for respite.
Anyway. Onward.
You need some frames. I found mine at Dollar Tree. I think the 5″ x 7″ size is the best for this project. Last, you will need to select your cans. I was planning to use Coke cans, but then I found these fun, colorful cans from Bootstrap Brewing.

Step 2 – Preparing Cans and Frames
You will need a mat for all of your frames. I used the paper insert from the frame as a template to cut the white cardstock to the size I needed.

To prepare the cans, I cut off the top and bottom to get to the walls of the can.

I always save the extra pieces for other projects. This video shows you my detailed procedure for breaking down aluminum cans.
Next, you will need to flatten the sheets to prepare them for cutting. I used my iron for this step.

For more details on flattening cans, check out this video for three different methods.
Step 3 – Cutting and Weeding
Each of the silhouettes will be cut twice. Once from the cardstock weight paper (either black cardstock or junk mail/old card option with black paint) and once from aluminum.
For this post, I am assuming that you already have a general understanding of your cutting machine and know how to cut and weed cardstock.
You will need to make sure that your art silhouettes will fit on the aluminum sheet size. I recommend art that is no larger than 3 1/4″ x 7 1/2″.
To cut the aluminum, you need to tape all the edges with painter’s tape and ensure that your aluminum is flat and smooth on the mat.

You will use the regular fine point blade and the copper 40 gauge material setting to cut the aluminum.

Weeding aluminum is quite different than weeding other materials. In fact, I am not sure it is really weeding. The aluminum sheet will still be intact once the machine is finished. It actually scores the material rather than cutting all the way through. This is what allows for clean, smooth lines on your cut shapes.
To remove your design from the rest of the material, you need to bend the metal along the score line carefully and then gently pull the material to separate along the score lines.

For more information on cutting and weeding aluminum sheets, watch this video.
At this point, you should have two identical shapes—one from cardstock-weight paper and one from aluminum.

Step 4 – Painting
If your cardstock piece is already black, you can skip this step. If not, you will need some black acrylic paint. You can paint the entire shape if you want to, or just paint the edge of the material you want to show for your drop shadow effect.

Step 5 – Assembly

I used an Elmer’s glue stick to assemble the metal and cardstock pieces. Next, I added a few pieces of double-sided tape to the back and attached the pieces to the white cardstock mat before reassembling the art inside the frame.
You will need to repeat these steps for each of your silhouette shapes.
I decided to make my four frames into one large piece of wall art by taping the backs together with duct tape.

The last step was to add a ring made from part of a metal hanger to hook the art on the wall.

I hope you enjoyed today’s project. For more details, be sure to watch the video tutorial at the top of this post.
Happy Upcycling,
Cindy


Did you miss this Aluminum Can Craft Project?
Check out the tutorial below.
Advertising Disclosure: Upcycle Design Lab may be compensated in exchange for featured placement of certain sponsored products and services or your clicking on links posted on this website.


