How To Make Fused Glass Earrings In Your Microwave Kiln
I am not a risk taker. I don’t gamble or invest in the stock market. My activities usually revolve around TV watching, dog walking, and the occasional visit with family and friends, all of which I believe to be considered relatively safe activities.
Then, of course, there is the crafting, where I engage in the most daring and dangerous undertakings. But even then, it is not as if I am setting out to be known as some sort of daredevil. I try to use the normal amount of caution with hot, sharp, or otherwise menacing objects.
Perhaps inaccurately, I assume that others will do the same, believing naively that individuals are intelligent and responsible for their own well-being, having, at the very least, learned some basic precautions in their formative years.
At any rate, I am relatively certain that the burden for the welfare of all mankind is not resting on my slopey shoulders. And that my neglecting to mention every way in which a person might harm themselves when venturing into the crafting realm will typically not result in any calamity.
But as you might guess, there are those who disagree with me.
I once had someone anonymously comment that I should be ashamed (yes, they actually used the word ashamed) of myself for posting a video on how to fuse glass because, “clearly, I knew nothing about it.” The subtext suggesting that I might somehow be endangering our species, for which I can only assume someone didn’t get their necessary morning cup of coffee or a hug, and while I am sorry that I upset this person (I do try my best never to make my projects offensive after all) I still can’t be responsible for what others think of my creations or how I went about making them.
And so, after a long hiatus from fusing glass due to shame or perhaps just an interest in other more dangerous crafts involving the razor-sharp edges of aluminum cans, I am finally back with a new fused glass project.
So, fair warning, I still consider myself a beginner at most, if not all, of the crafts I endeavor to create. I like to share what I have learned and created.
If you feel daring and adventurous, perhaps you would like to continue and see where this goes. 🙂
Advertising Disclosure: Upcycle Design Lab may be compensated in exchange for featured placement of certain sponsored products and services or your clicking on links posted on this website
Tools and Supplies
- Microwave
- Microwave Kiln
- Gloves
- Safety Glasses
- Heat Resistant Gloves
- Fusing Paper
- Earring Hooks
- Jump Rings
- 20 Guage Jewelry Wire
- Round Tipped Jewelry Pliers
- Needle Nose Pliers
- Clear E6000 Glue
- Sand Paper / Grinder
- Wheeled Glass / Tile Cutters
- Glass
Safety
Please be safe.
Glass Cutting
You will need four small squares of glass to make each pair of earrings.
I used my wheeled glass nippers to cut pieces into 1/4″ squares from an empty wine bottle. (Sometimes, the thoughtless comments are treated with alcohol.)

It is okay if the pieces aren’t perfect squares; they just need to be close to the same size and shape.

Glass Fusing
The first step in the fusing process is to protect the kiln base. To do this, you will need to cut a piece of kiln paper large enough to fit under your glass pieces. Next, place the glass squares on the fusing paper and stack a second piece on top with the corners of the top piece offset from the corners of the bottom piece. This will encourage the fused shape to become rounded.

I used to give estimated fusing times for my projects, but I recently purchased a new kiln that requires a very different fusing time than my original Fuseworks Kiln. So my recommendation is to follow the instructions that come with your kiln and don’t be afraid to experiment.
You want the pieces to be rounded and uniform with an even yellow or orange glow. In this photo, the two pieces on the left are ready, but the two on the right need a few more seconds of fusing.

Once the pieces are fully fused, the kiln needs to cool down. You will need a heat-resistant surface to place the klin on for about an hour before removing the glass from the kiln.

Making Jewelry Bails / Bales?
I don’t know the proper spelling of this word. Feel free to weigh in in the comments if you feel strongly one way or the other. I would much prefer having my spelling corrected over any commentary on my irresponsible crafting behavior.
Anyhow, you can buy jewelry bails or make your own jewelry bales with some 20 gauge wire (see how equitable I am trying to be. Please don’t be offended, dear jewelry bail or bale. I am a nice person and I never mean any harm.)

Anyway, I’m sorry if this post has gone off the rails. Where were we? Oh yes.
To make these jewelry bails, I used my round-tipped jewelry pliers to make a flat coil on one end of a short piece of wire. Then, I finished the bale by rolling a side-by-side coil on the other end of the wire.

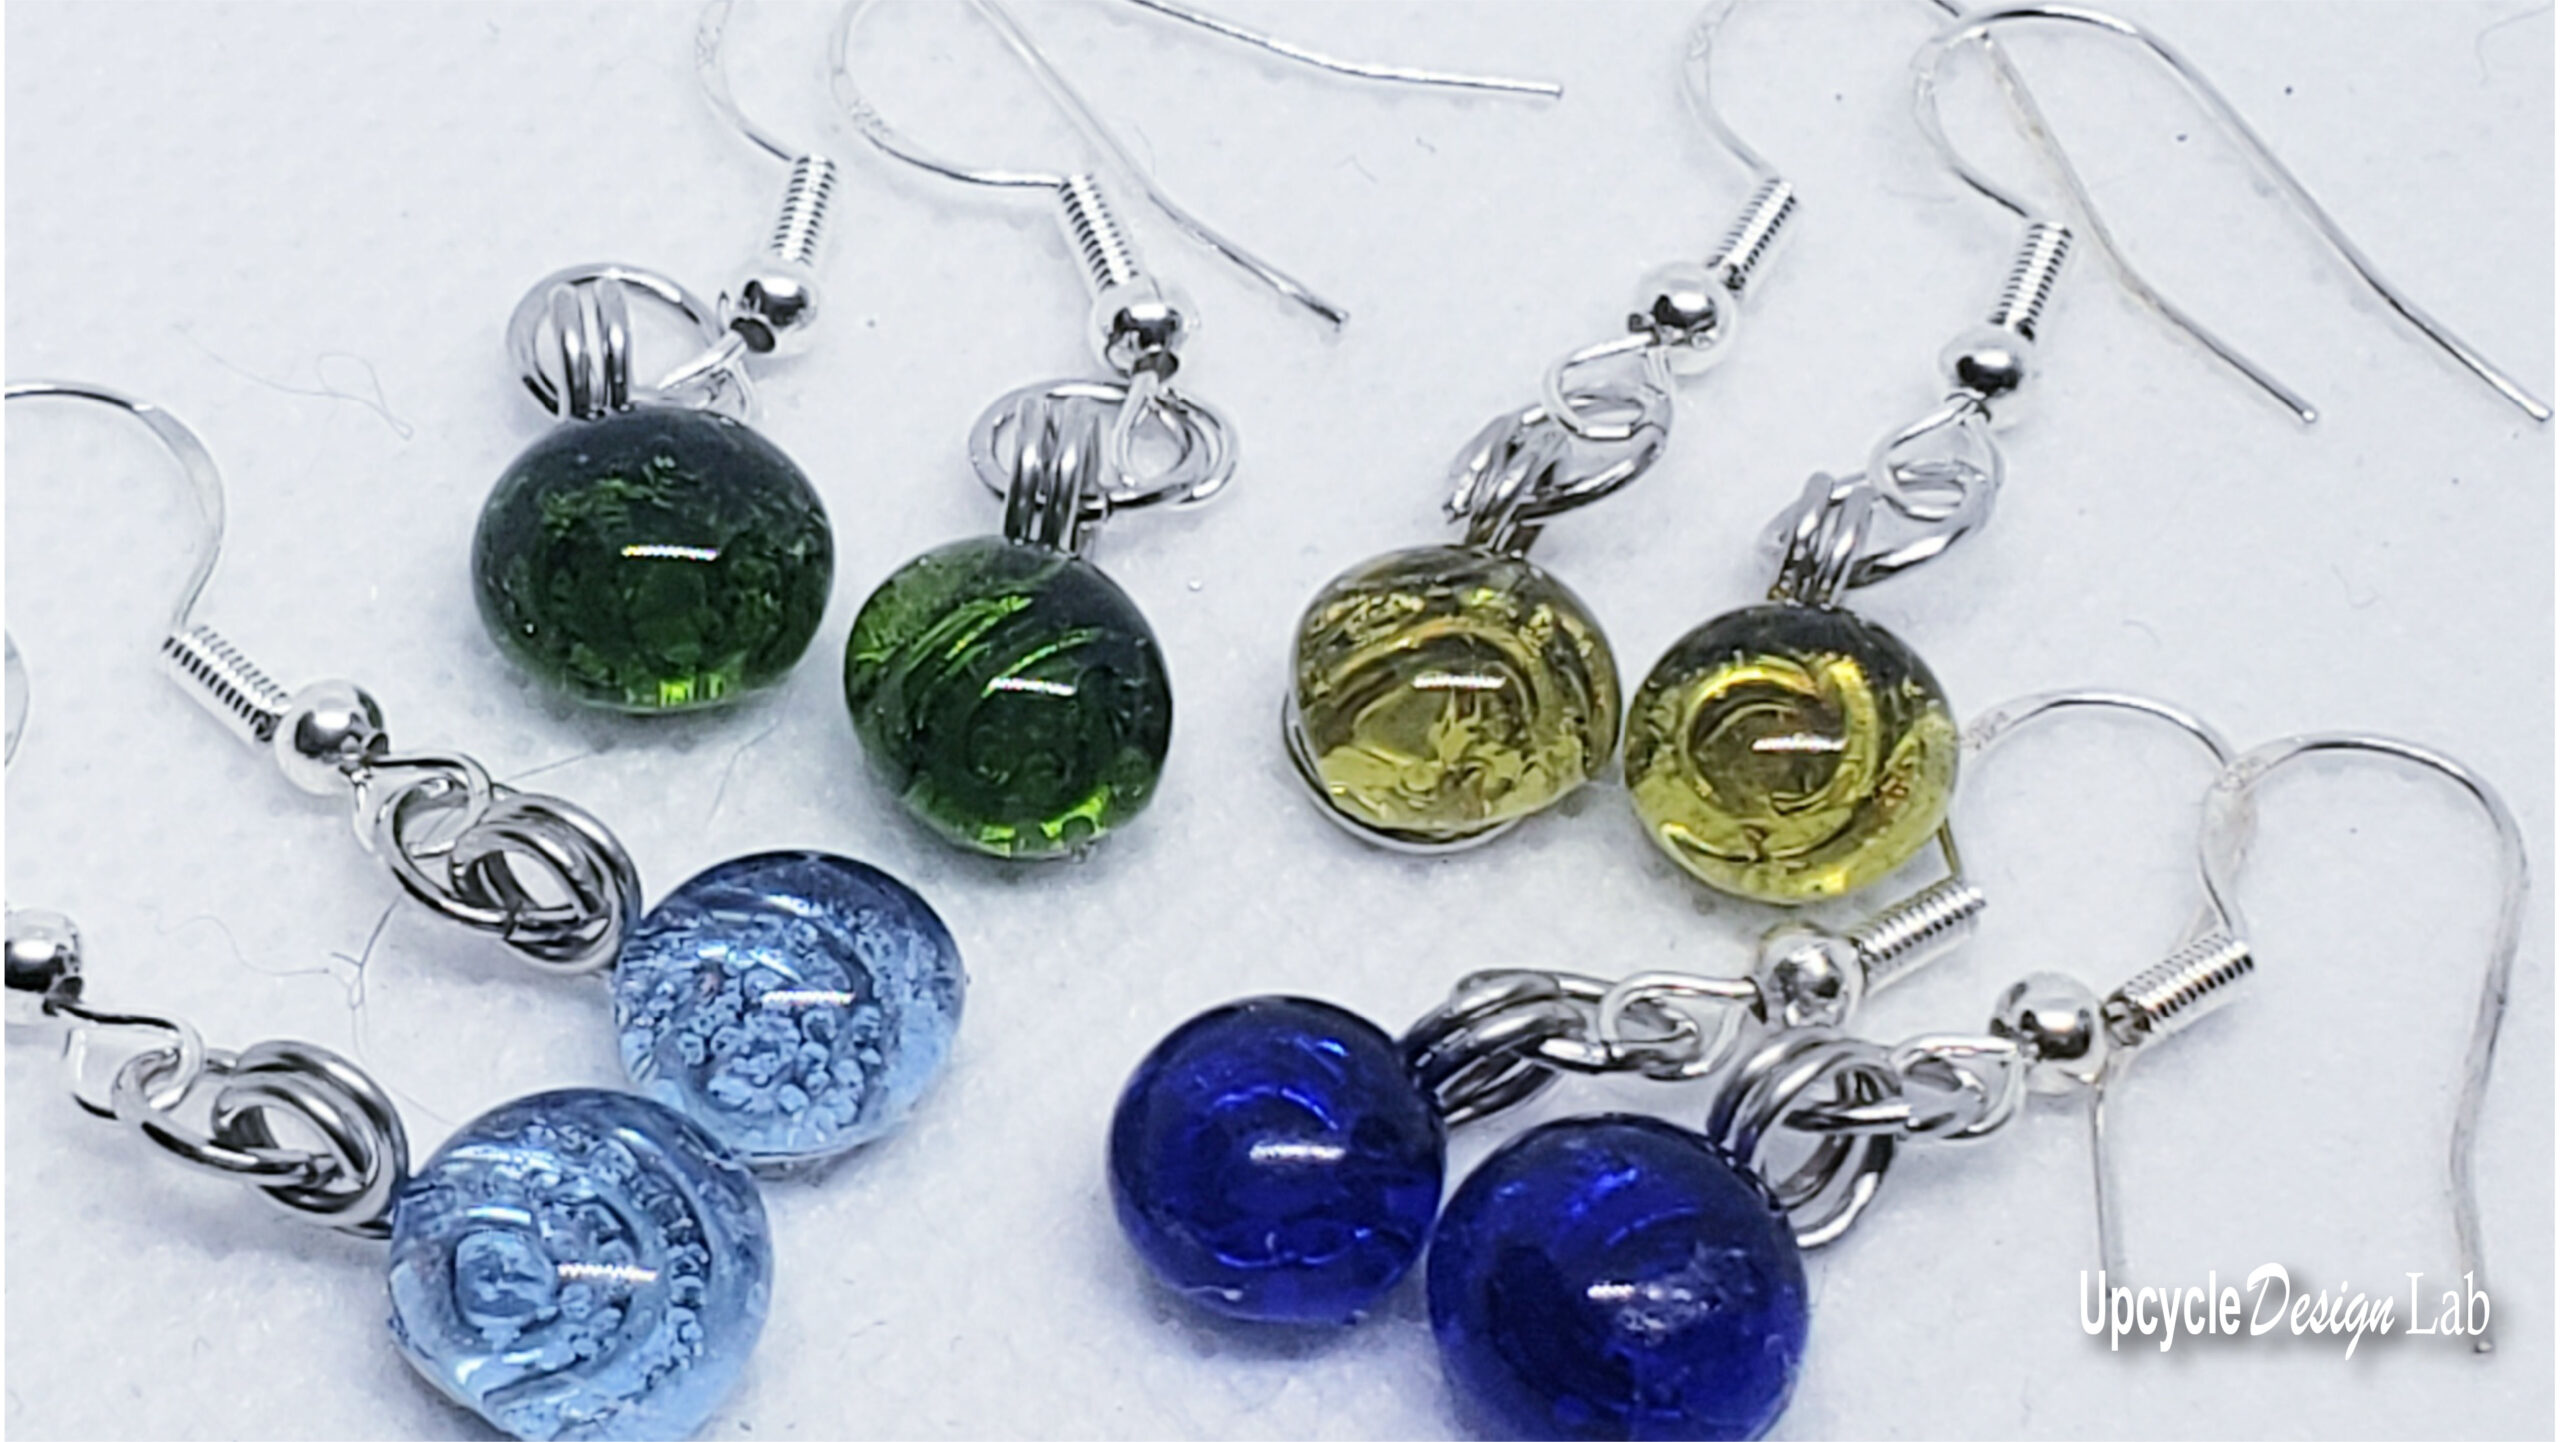
Assembling Earrings
I used a small amount of clear E6000 glue to attach each of the small fused glass pieces to the jewelry bails and then hooked the jewelry bale to the earring hook with a small jump ring.
If you would like a more detailed version of this process, check out the video at the top of this post.

Stay fearless and crafty, my friends.

Happy Upcycling,
Cindy

Advertising Disclosure: Upcycle Design Lab may be compensated in exchange for featured placement of certain sponsored products and services or your clicking on links posted on this website


