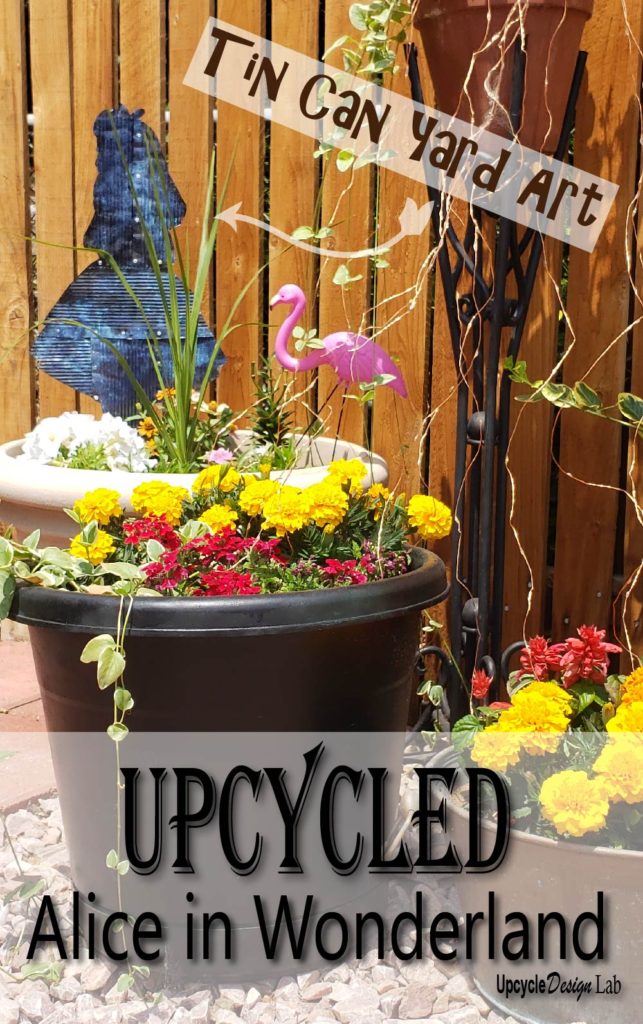
Whimsical Alice in Wonderland Tin Can Yard Art
Hello and welcome.
It’s so lovely to have you here. If this is your first time visiting the lab I hope you will stick around and check out some of my other upcycling projects. If you have been here before welcome back. Either way, if you haven’t already, I hope you will consider becoming a subscriber. I would love to have you join in on all of my crazy and sometimes not-so-crazy experiments.
Do you like Alice in Wonderland? Well I do. 🙂
The funny thing is that when I set out to decorate or redesign a space I don’t do it with the intention of making it an Alice in Wonderland theme. It just happens along the way somehow. This has happened twice now. The first time was during my craft room makeover and now again it has happened with my little corner flower garden.
I start with the intention to upgrade a certain space, and one project leads to another. Somewhere in the process, an Alice-inspired project pops into my head and then another, and so on.
The craft room started with the simple requirement to finish off an exposed wall. But it soon turned into a year-long labor of love, with multiple upcycled projects. Many of the projects took an Alice in Wonderland turn. The room even includes a floor-to-ceiling cardboard art installation of the Cheshire cat. And, yes, that is as crazy as it sounds.
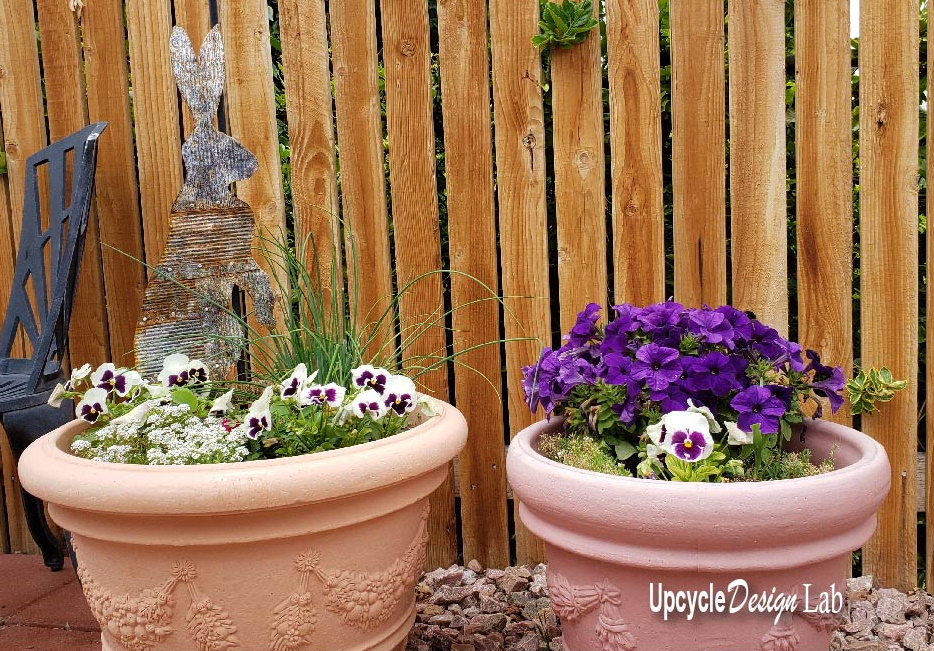
My garden project didn’t, or at least it hasn’t yet, gone that far off the rails. It started with a simple teacup bird feeder. I should have noticed that I was already slipping in an Alice in Wonderland direction. But, I was a little oblivious.
But today my project is full-on, unapologetically, Alice in Wonderland, and I am quite delighted with it.
Alice in Wonderland is a wonderful metaphor for the creative process, don’t you think?. Many times projects take us down their own rabbit holes, in new directions, that we didn’t plan or foresee. And those diversions are some of the most joyful moments of making something come to life.
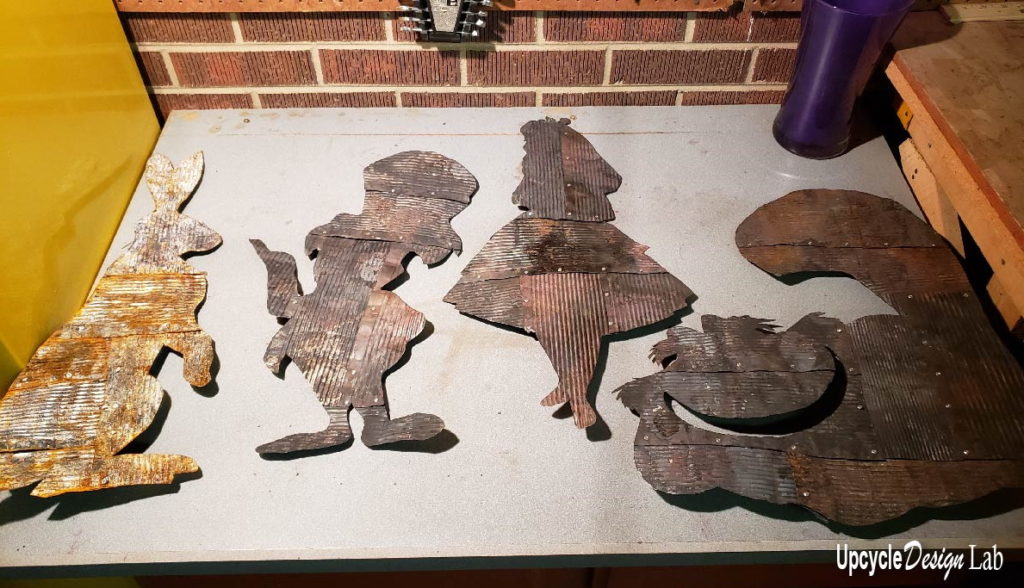
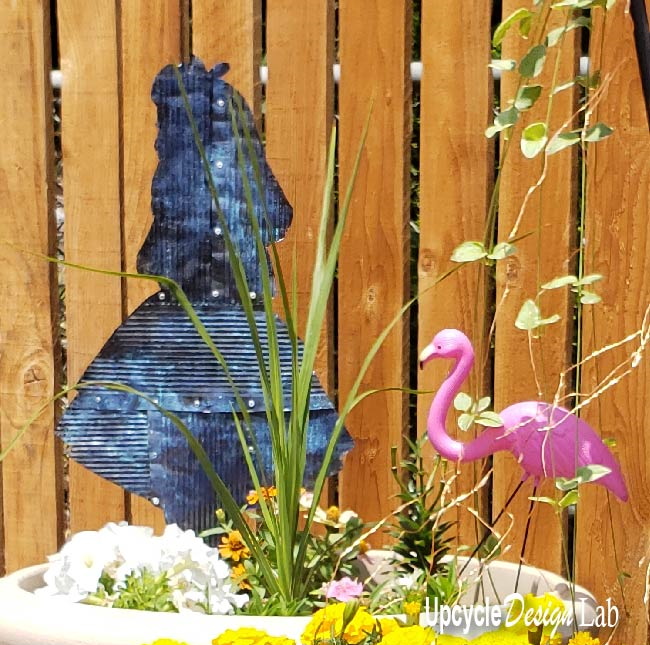
The idea for this project came to me as a single item. I wanted to make a recognizable shape from a sheet of flattened tin cans. So I decided on a rabbit shape.
Well, the rabbit turned out better than I imagined it would, and it said: “make more of me” in a demanding sort of voice, so of course, I did.
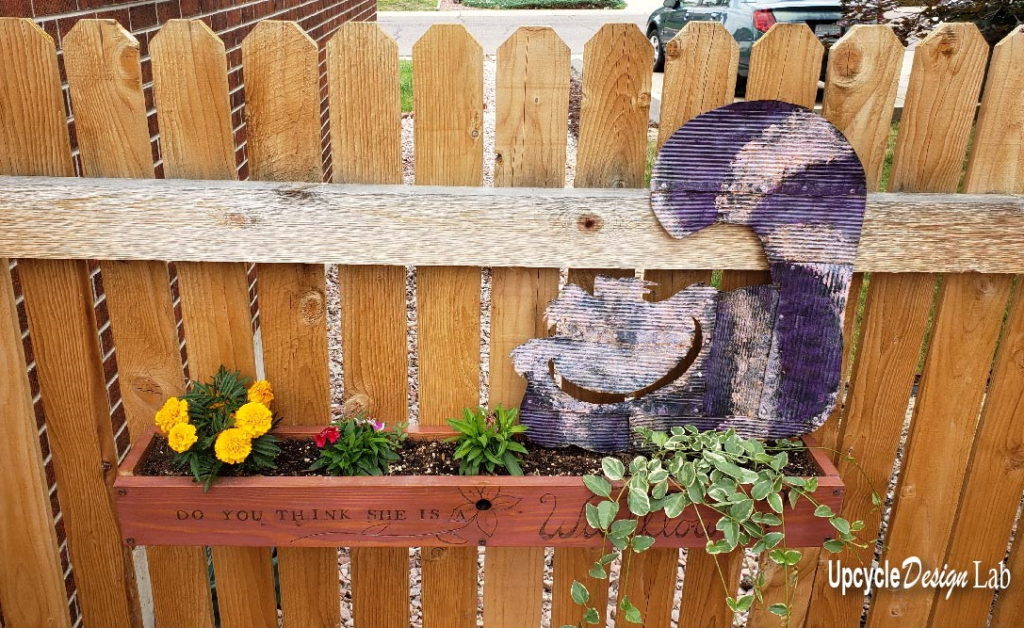
As I was working on this tin can project, I decided that the corner flower garden needed a flower box. I wrote about this project in my last post. The flower box also had its own ideas of what it wanted to be. So, again, I dutifully followed along. It is more of an adventure when you let the creation guide you. I have tried to force projects in the direction I initially imagined, and let’s just say they don’t often end well. 🙂
Anyhow that is a bit of the story of how my Alice in Wonderland flower garden came to be. Let’s dig into the project, shall we?
Advertising Disclosure: Upcycle Design Lab may be compensated in exchange for featured placement of certain sponsored products and services, or your clicking on links posted on this website.
For a quick overview of the tools and materials used in this project, check out my Amazon Idea List for this project. If you need one of the items and make a purchase, I will receive a small commission at no additional cost to you. Thanks in advance for your purchase. If you just want to check out all the required supplies, this is the easiest way to find that information. Also, check the comments section of the Tin Can Yard Art Project Idea List for the recycled materials you will need to collect.
Step 1 – Rust empty tin cans
The first thing you need for this project is some rusty tin cans. If you are interested in how I quickly rust tin cans watch this video. My designs used about 6 cans each. I used mostly larger 22oz cans, but smaller cans work as well.

Step 2 – Cut and flatten cans
Once the cans are rusted, they need to be cut and flattened into sheets. Gloves should be worn for this step, and all subsequent steps, to protect your hands from the rough metal edges. Safety glasses and a mask are also recommended.
This step is messy. You will probably want to work over a trash can. Use tin snips to cut the cans. I like the style that is scissor-shaped. Cut down one side and across the bottom of the can. Then cut off the bottom and the top reinforced rim of the can. Carefully flatten the can by hand. Further, flatten can be done by hammering on a hard surface.

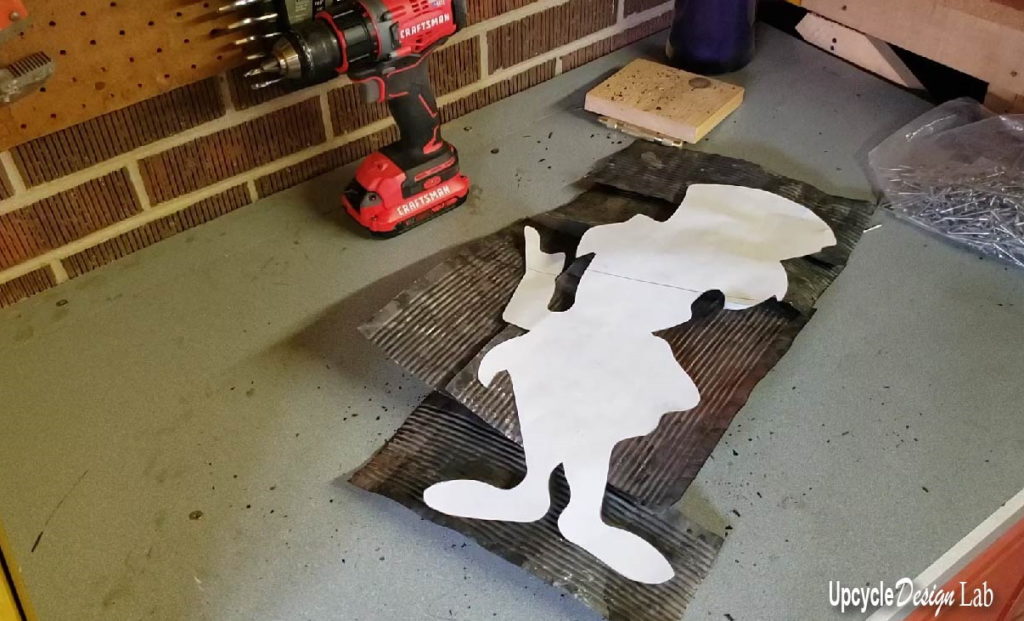
Step 3 – Layout the design
Once you have several flattened tin pieces, lay them out in shape to fits your design. All the edges should have a 3/4″ overlap. I like to reverse the direction of the cans for more surface interest. Also, I try to keep the overlap of the cans going in the same direction. But you can layout the cans however you like as long you maintain the 3/4″ overlap on all the edges.
Step 4 – Assembling the tin can pieces
This step is a little confusing to explain. (there is more detail in the video) The general point here is that the can pieces are joined together using pop rivets. For this step, you will need a cordless drill with a 3/32″ bit and some 3/32″ rivets, and a rivet gun.
Sorry to veer off on this tangent. If you don’t have a rivet gun, you should get one. They are not very expensive, and they are fun to use. I have used a couple of different brands, but this one is my favorite. It was a little more expensive, but the handles are shorter, and it is easier to use.
Ok onward. The tricky part of this step is deciding where to place the rivets. You don’t want to use a lot of extra rivets, in part because you don’t want to waste them but also because it makes the next step more difficult. You do want fairly even spacing of the rivets. And you don’t want to have a rivet on your cut line. The rivets should be placed inside the artwork template. My tip is to use as few rivets as possible to hold the pieces together. You can go back later after the piece is cut out and add more rivets.

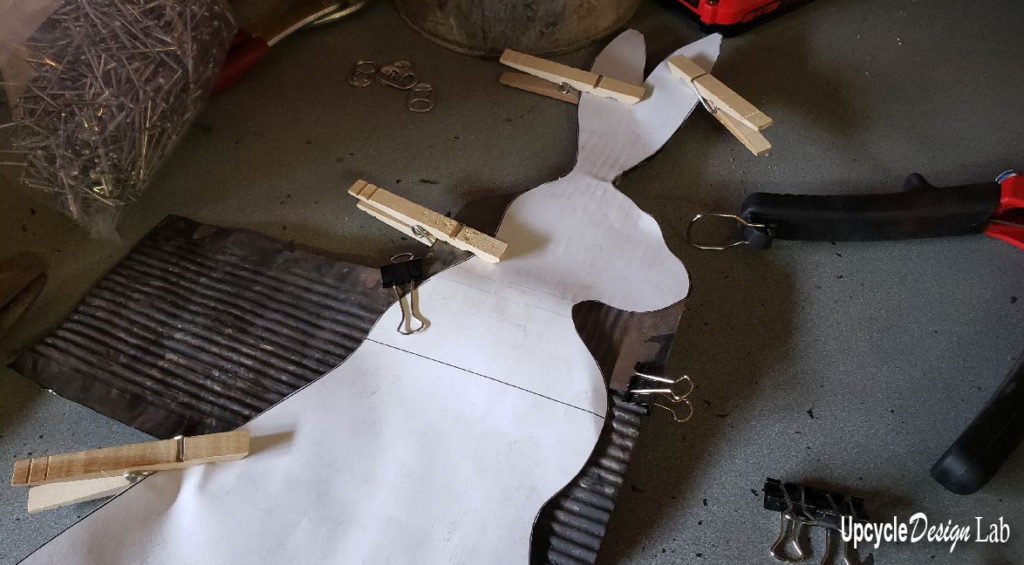
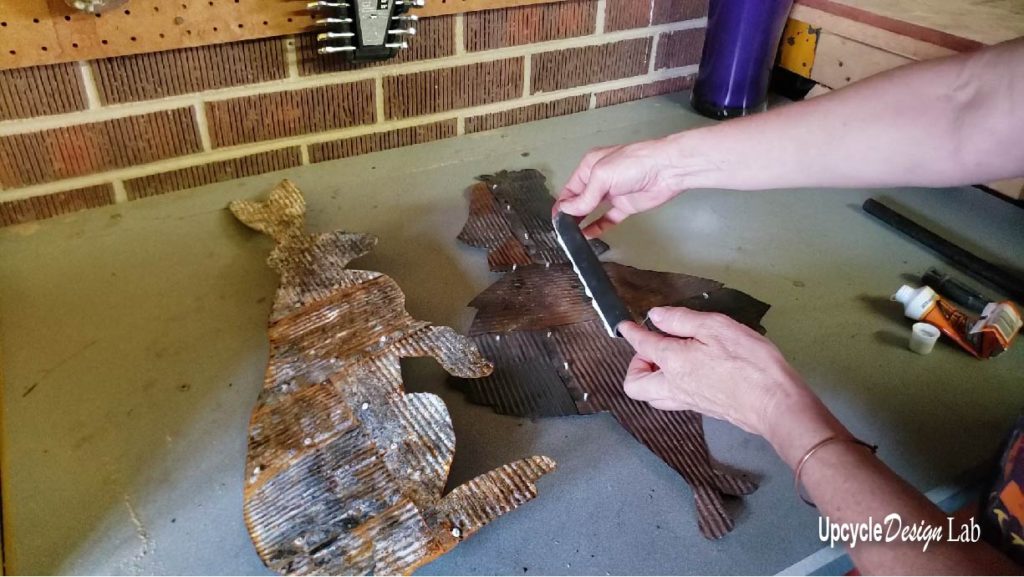
Step 5 – Cutting out the shape
This step is pretty straightforward, but it can be a little tricky. I used some clothespins to hold my paper pattern in place. Carefully cut around the paper pattern. These scissor tin snips come in different sizes, and it helps to have a larger and a smaller pair. The most important thing is to go slow.
Work at removing the excess part of the can from different angles. Inside curves are the hardest to cut, so you might want to avoid them in your pattern if you can.
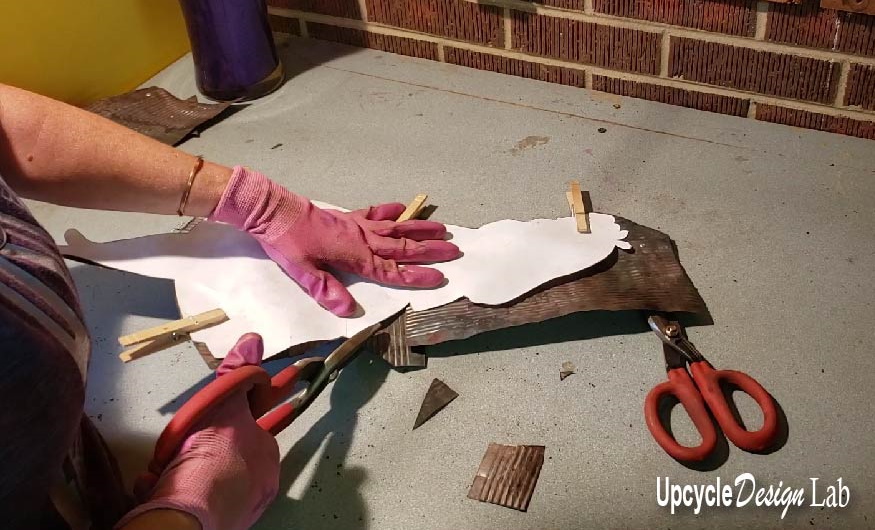
If you are careful and patient you can cut some pretty delicate details, like the cats whiskers and Alice’s nose.
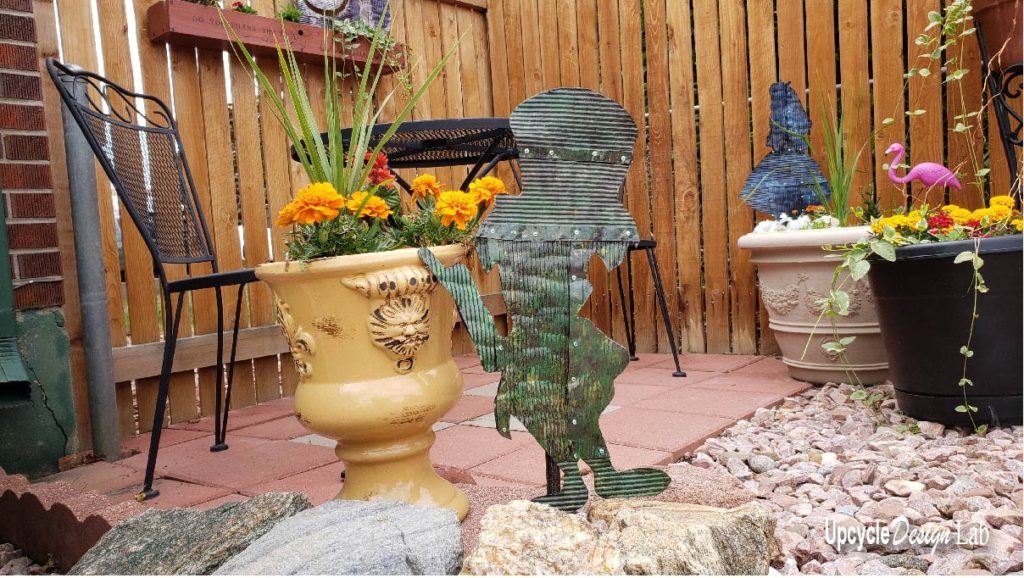
Step 6 – Adding support piece
I used some things I had on hand. PVC pipe and rebar would also work for this step. The spike goes into the ground, and the tube slides over the spike to hold the yard art upright. The tube also helps to support the piece. If you have a large design, you may want more than one support. I used Gorilla construction glue to attach the tubing to the backs of all the pieces.
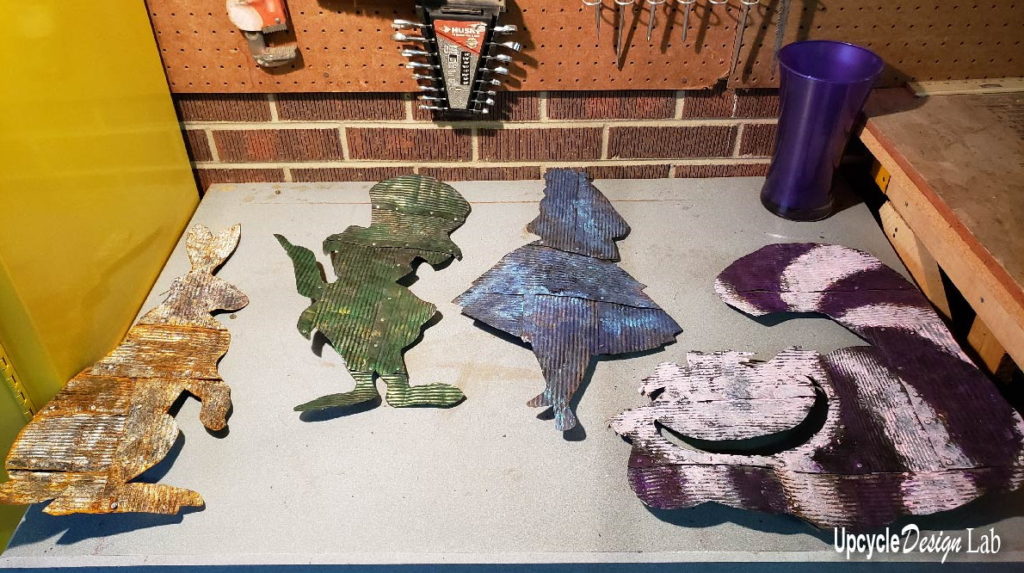
Step 7 – Painting
This step is optional. But I am kind of a color gal. So, I used some craft paint and paper towels to add a little color to the pieces.
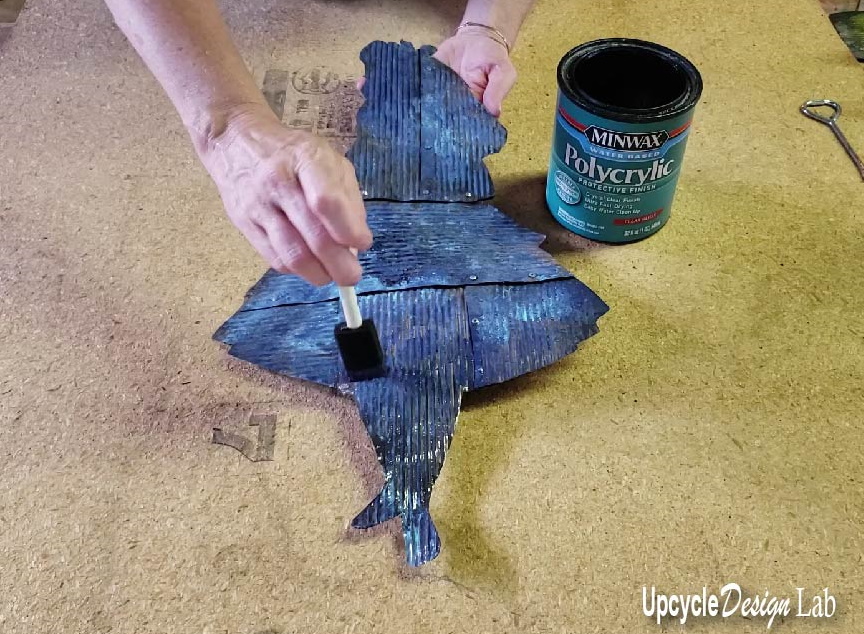
Step 8 – Sealing
I used Minwax Polycrylic to seal my yard art. I don’t know how well it will hold up outside. Polycrylic is recommended for use indoors. But I used it because it dries completely clear. The product I have for outdoor use turned my paint colors yellow. If you have a clear drying sealer for outdoor use you should use that product and then let me know what it is. 🙂
No matter what you use, I think the rusting process will continue. So your pieces will change over time depending on the environment they are exposed to. I like to think of it as part of their charm.
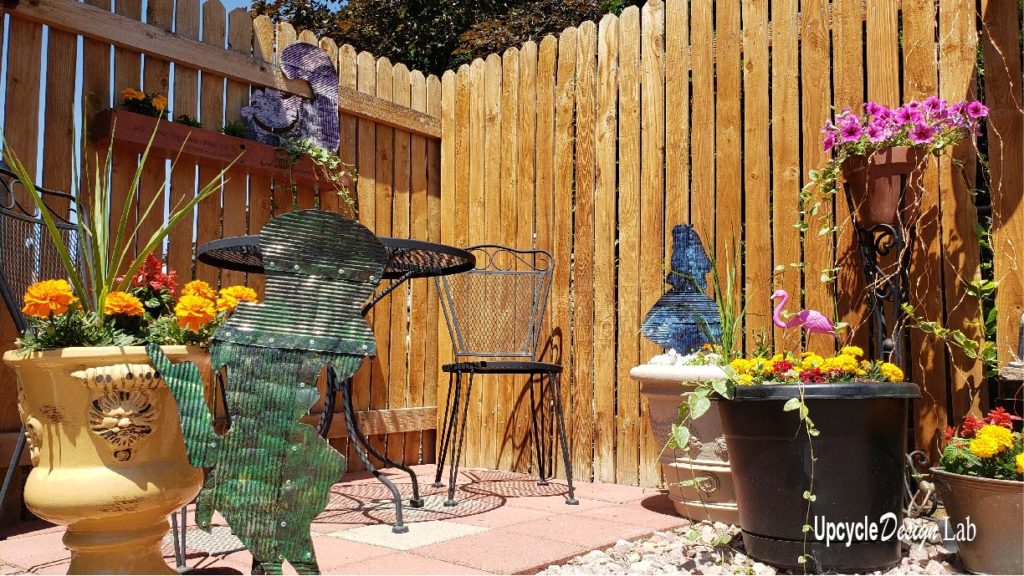
Welcome to my little Alice in Wonderland Flower Garden.

There are more details in the video tutorial below.
Thanks so much for stopping by. I hope you found some inspiration here.
Happy Upcycling,
Cindy
Advertising Disclosure: Upcycle Design Lab may be compensated in exchange for featured placement of certain sponsored products and services, or your clicking on links posted on this website.
Amazon Affiliate Links


Love these! What a great idea and they look so good in your garden. Thank You Cindy!
Thanks 😊 I am pretty happy with them.
You should be !