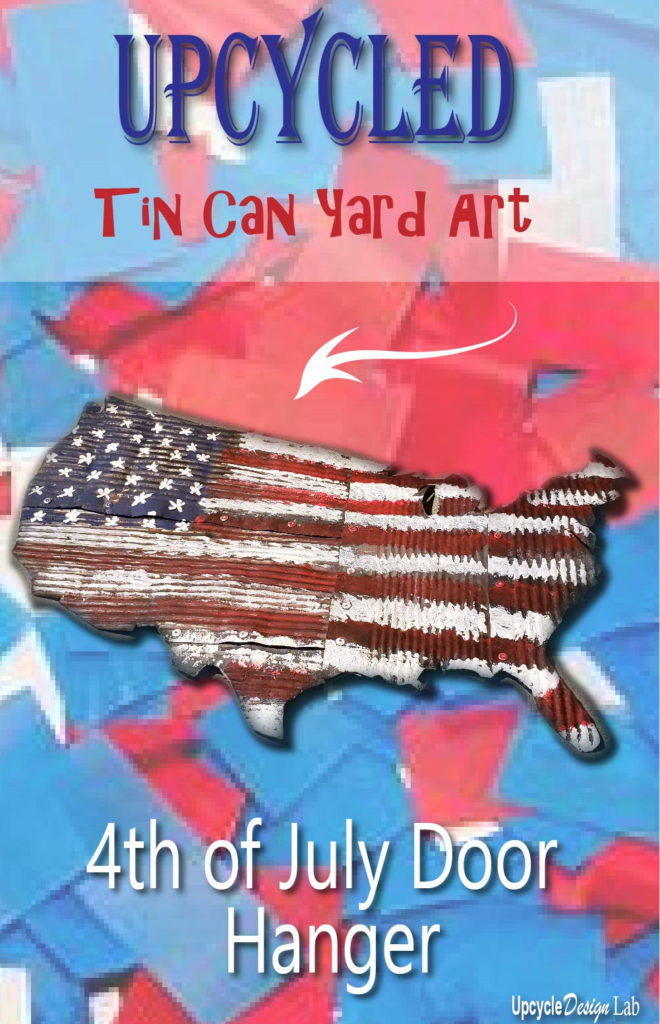
Fourth of July Door Decor Made From Trash
Hello There,
I know I am kind of repeating myself here but, I had such fun with my last project, making Alice in Wonderland yard art, I decided to make another tin can art decoration. One of the best things about this project is you can make it in pretty much any size or shape. For today’s project, I made a version that will hang up but, you can also make them stand up as I did with the Alice in Wonderland figures.
Advertising Disclosure: Upcycle Design Lab may be compensated in exchange for featured placement of certain sponsored products and services, or your clicking on links posted on this website.
For a quick overview of the tools and materials used in this project, check out my Amazon Idea List for this project. If you need one of the items and make a purchase, I will receive a small commission at no additional cost to you. I thank you in advance for your purchase. If you just want to check out all the required supplies, this is the easiest way to find that information. Also, read the comments section of this list so you will know what recycled materials you will need to collect.
Step 1 – Gather and rust tin cans

If you have seen some of my other projects, then you know, I like to use rusted tin cans in a lot of my projects. One of my favorites tin can projects is this tabletop cover-up. I made it years ago, and it has held up really well. Please don’t be alarmed. This link will take you to my old blog.
I am skipping over the rusting part in this post but, if you are interested in how I quickly rust tin cans, you can check out this video.
Step 2 – Cut and flatten cans

I have a couple of different sizes of scissor-shaped tin snips that I use to cut the cans. Once the top and bottom of the can are removed the metal can be flattened using gloved hands. Be careful the edges are sharp. To further flatten the piece use a hammer on a hard surface to pound out the metal.
Step 3 – Layout tin pieces
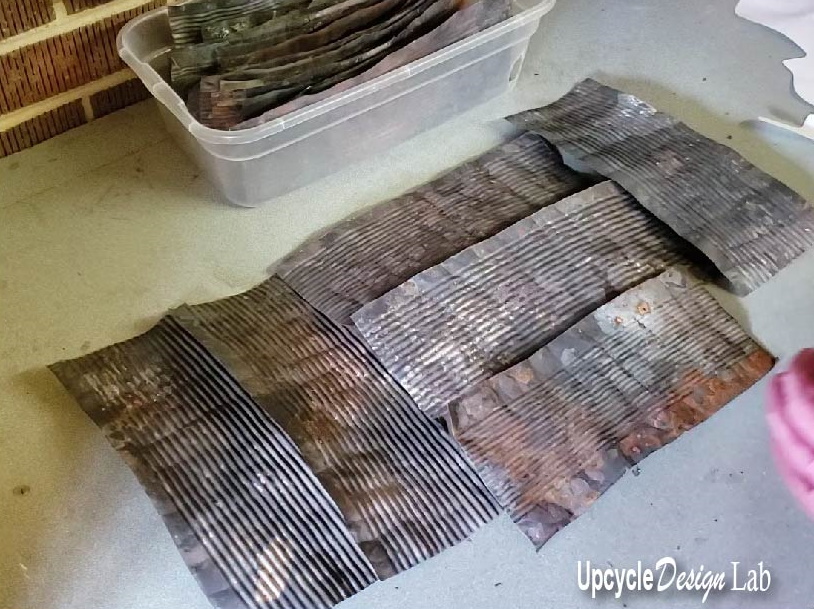
The size of your art will determine how many cans you will need. You just need to make sure to overlap the can edges at least 3/4 of an inch.
Step 4 – Rivet cans together
This part is a little tricky and hard to explain. The main point is that you want to have the rivets evenly spaced and inside the field of your art, and definitely not along the edge where you will be cutting.

I recommend watching this video tutorial even though it is for my other project. It will give you more information on assembling the pieces together and the project as a whole.
Step 5 – Cut out the shape
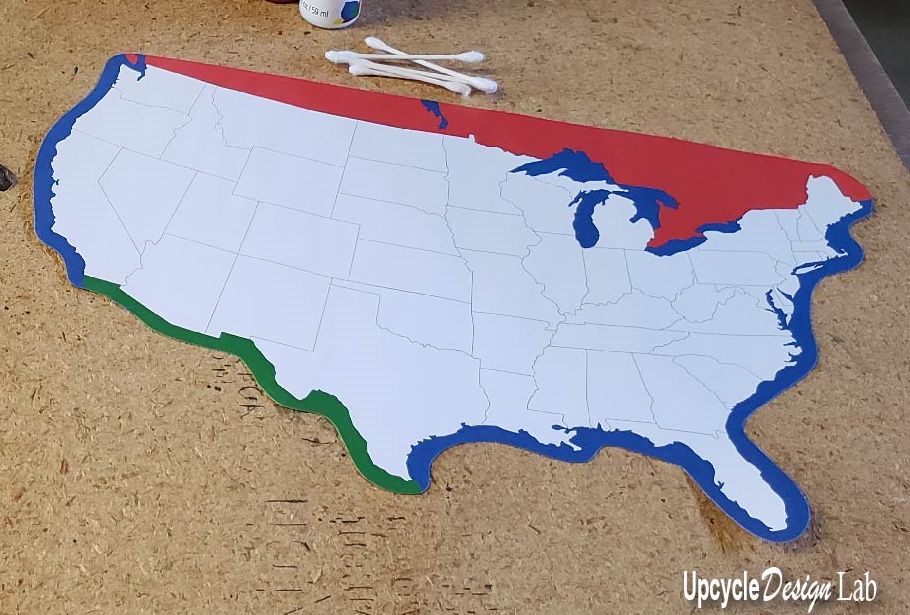
I chose this US map shape for my door ornament. To cut the shape hold the paper pattern onto the tin cans with some clothespins. It takes time and patience to carefully cut out the shape. The tin snips, are bulky to hold but are still good for capturing all the small details.
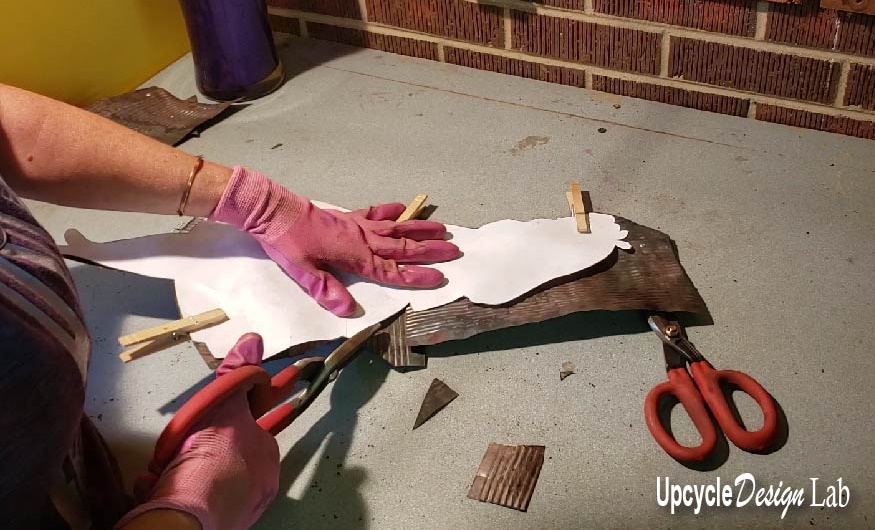
Sorry this picture is from my other project but this gives you the general idea.
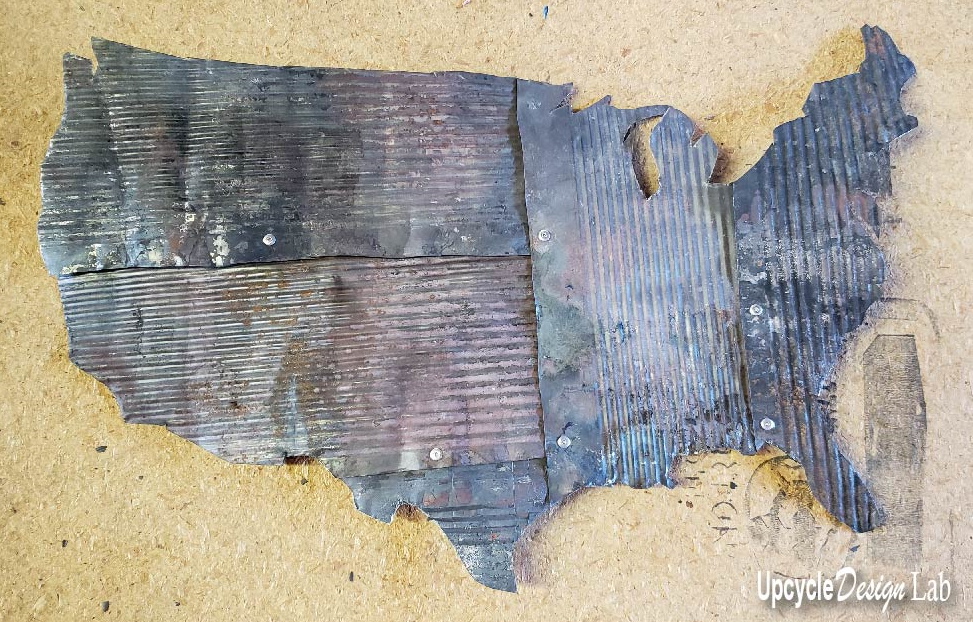
Here is my new piece once it was cut out. It needs a few more rivets added but I prefer to add the extra rivets once I can see the finished shape.
Step 6 – Add hooks and hanger
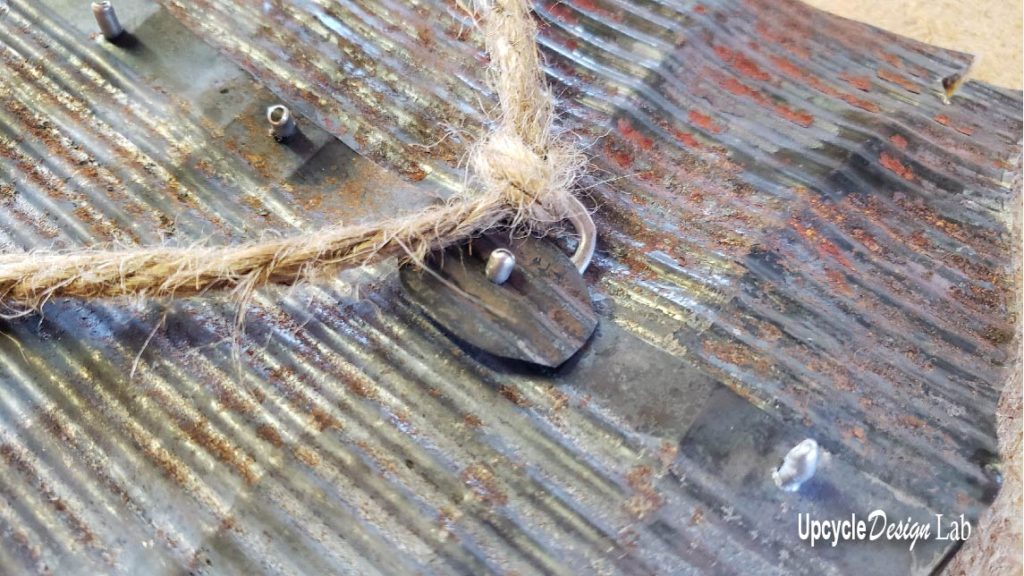
To make the hanger for the back I used some twine, two soda can pull tabs, and a small circle piece of a tin can. The pieces are held together with a rivet. Sorry, this isn’t the best picture but it shows one side of the hanger on the back of the piece.
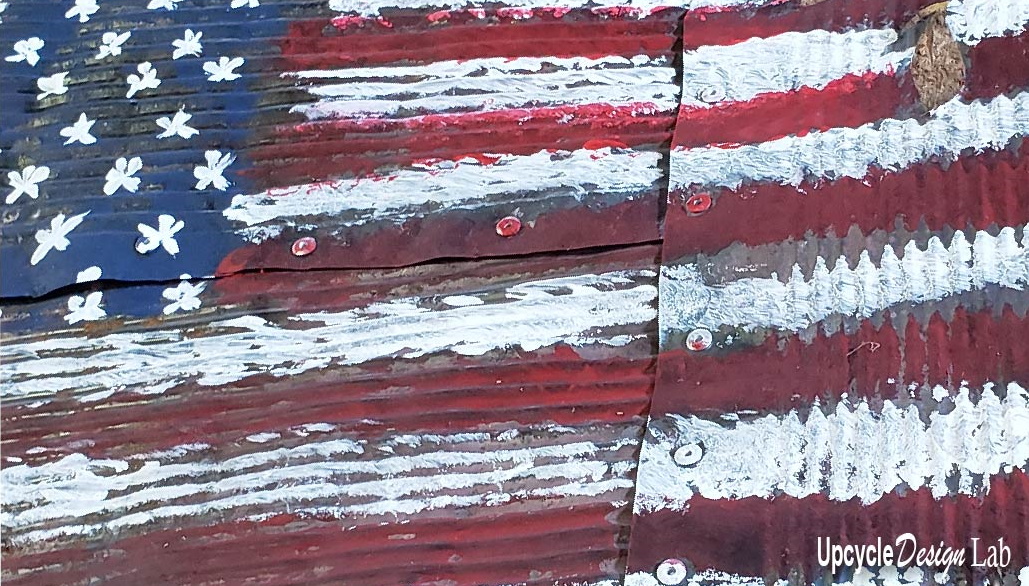
Step 7 – Painting
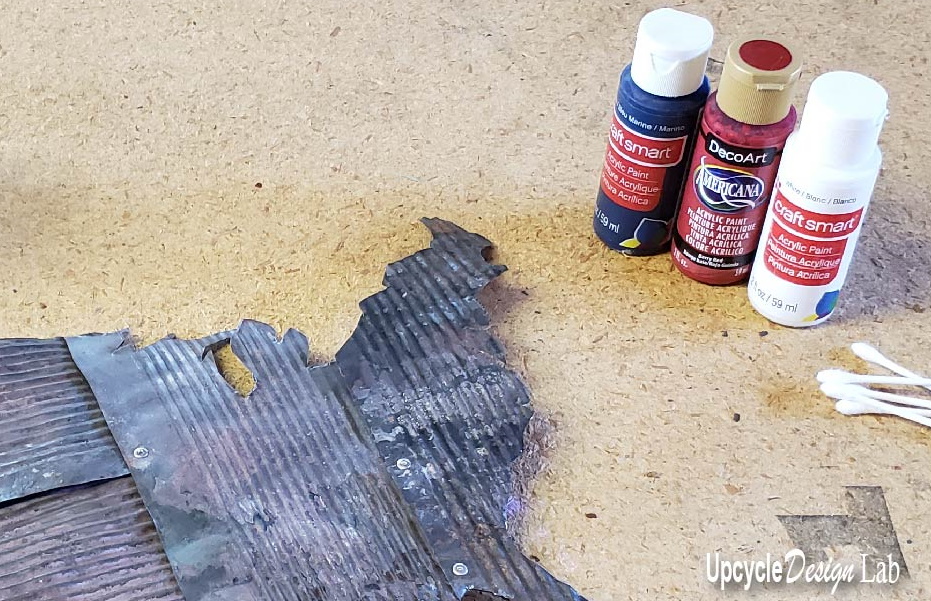
This step is optional. You can add as much or as little paint as you like. I like to use a paper towel to dab the paint around. This technique allows some of the rusty can to show through.
Step 8 – Finishing
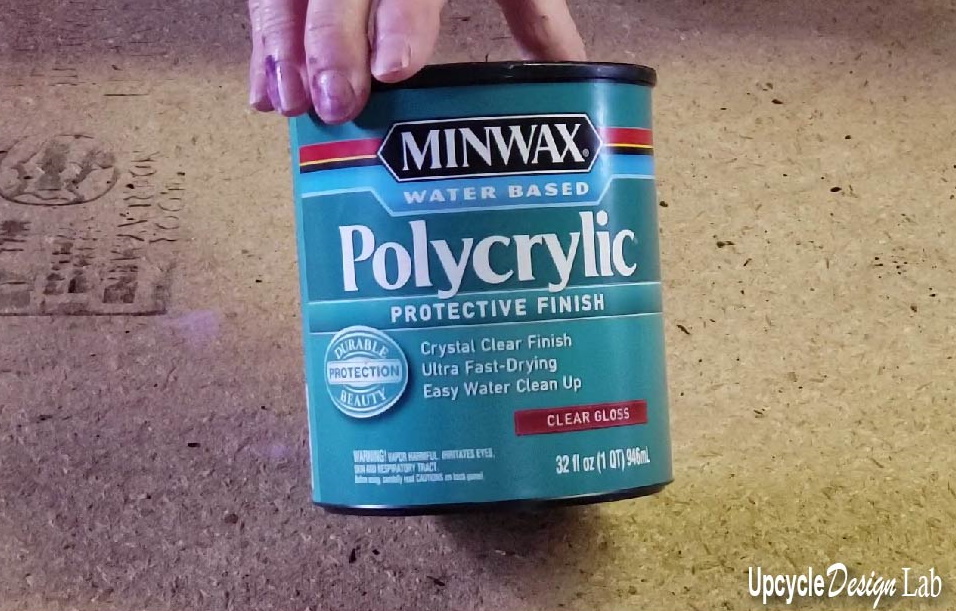
I used Minwax Polycrylic to seal my pieces but, it is recommended for indoor use. So if you have a clear drying product for outdoor use, I would recommend using it.
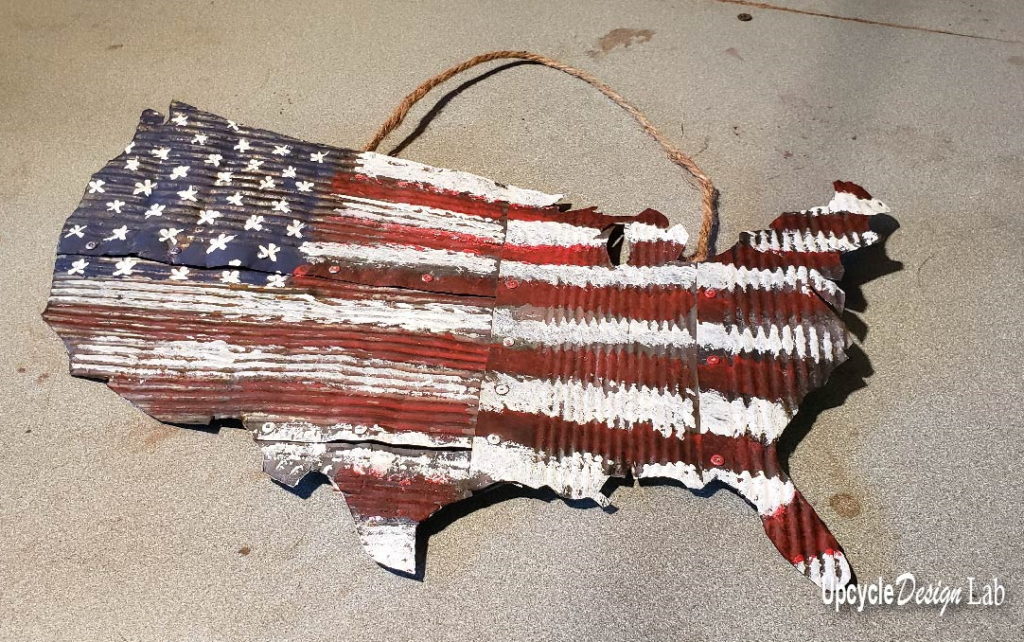
Here is the finished piece. Sorry I didn’t get a picture of it hanging on a door before I gave it away.
Thanks for checking out my project.
Happy Upcycling,
Cindy
Advertising Disclosure: Upcycle Design Lab may be compensated in exchange for featured placement of certain sponsored products and services, or your clicking on links posted on this website.