Baked mod podge Christmas ornament
Are you busy baking Christmas-shaped sugar cookies with bright-colored frosting and shiny sprinkles? Or maybe some gingerbread men with tidy white icing? Perhaps some pies or candy making are more your thing.
Me? Well, I am baking mod podge. Because I am wired weird, I guess. And it’s better for my diet.
Rest assured here, folks, I am not advocating eating any mod podge. I am just making the point that I certainly don’t need any extra sweets around this time of year. And it seems you can’t be too careful about the disclaimers you make online these days, you know, with all the dangers that abound from the risky business of crafting.
Sometimes it seems as if common sense is a lost art, but that’s just the cranky old lady in me talking, and while she is gaining ground daily, I do try not to channel her too often. 🙂
Check out this video for more DIY ornament ideas.
Step 1 – Gather Supplies

- Two aluminum cans per ornament
- Draft top can opener
- mod podge gloss
- alcohol ink
- metal tape
- silver cording
- Scissors
- pairing knife
Step 2 – Removing Rim

The first step is to clean the aluminum cans. Next, remove the pull tab (I like to save them for other projects). Then I used the draft top tool to remove the top of both aluminum cans. Once the top had been removed, I used a pairing knife and some scissors to cut off the top portion of the cans. You may want to wear gloves as the raw edges of the aluminum can be sharp.

After the top portion of both cans was removed, I cut small slits in the aluminum and folded the tabs back and forth to remove the excess aluminum leaving only the rim of the can.


I repeated this process to make several ornaments.

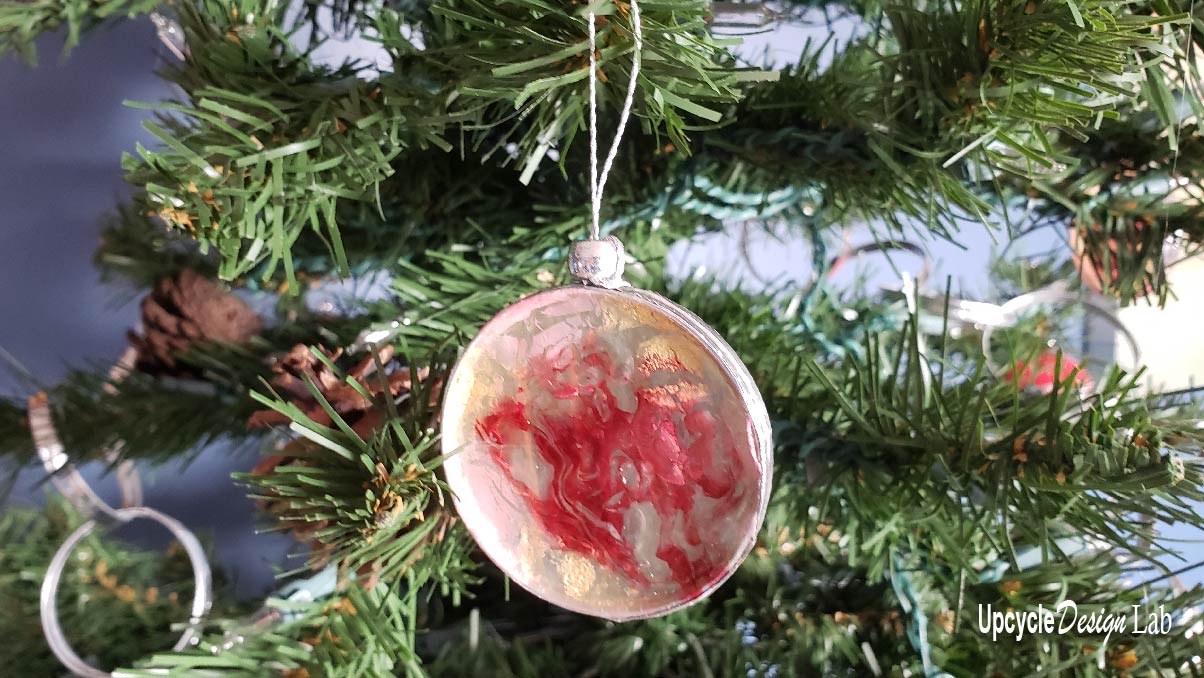
Step 3 – Baking
Here is where you might think it gets a little weird. I placed several rings on some parchment paper and a cookie sheet.
Note: You want to place the rough side of the ring toward the parchment paper.

Next, I filled all the rings with Mod Podge and added a few drops of alcohol ink. Then I baked the rings in the oven at 200 degrees for 4 hours.


As you can see, some of the mod podge seeps out during baking, but it is easily trimmed off, And the pieces are still usable.


Step 4 – Finishing

To finish the ornaments, I used the 2nd ring on the back side of the ornament. The rings are attached using a thin strip of metal tape. And a small loop of the silver cording is also attached using metal tape.


Happy Holidays,
Cindy

Advertising Disclosure: Upcycle Design Lab may be compensated in exchange for featured placement of certain sponsored products and services, or your clicking on links posted on this website.


