
How to make Rustic Homemade Christmas Ornaments – Recycled / Upcycled Tin Cans
November 3, 2021 – Update
Hey there,
I posted this project a few months back and I liked it so much that I decided to make some more ornaments to take to my first craft show. The show is just a week away so I am scrambling to get everything done. It has been fun but also a little crazy. If you would like to follow my first-time craft vendor series you can find it here. Also, If you would like some weekly upcycling inspiration in your inbox be sure to subscribe.
Here is a little mock-up of one area of my booth. It has been fun setting up my practice booth in preparation for the show.

But let’s get back to the original post.
Cheers,
Cindy
*****************************************************************************************************************************
Hi there welcome to the lab,
This tutorial will show you how I made these fun rustic homemade Christmas ornaments from some recycled tin cans and a few items from the Dollar Tree. They are inexpensive to make, and you can cut them in a lot of different shapes. I used a bell, star, snowman, stocking, and a couple of ball shapes for my ornaments, but you could also make candy canes and gingerbread men. You want to keep the shape reasonably simple. You can find lots of shapes online or use some Christmas cookie cutters to make your paper patterns. Just make sure that the size of your design fits on the piece of the flattened tin can.
By the way, I do know that it is August, but maybe if you are like me, you could use a little Christmas right now.
I like to study trash and cast-off items to see if they can become functional again. So I am happy to share my successes here with you. I try to keep my failures out of sight and out of mind but believe me, there have been a few. So if you want to reuse, recycle, and upcycle, I hope you will subscribe to avoid missing the next experiment. You never know what material I will be playing with next.

Advertising Disclosure: Upcycle Design Lab may be compensated in exchange for featured placement of certain sponsored products and services or your clicking on links posted on this website.
For this project you will need:
- Several tin cans
- Tin Snips
- Center Punch Tool
- Cordless Drill or a Nail and Hammer
- Glitter
- Sequins
- Acrylic Paint
- Mod Podge
- Jute or Cording
- Small Paint Brush
- Cloths Pins
- Christmas Shaped Paper Templates
Step 1 – Empty and Rust Tin Cans
The first step in making these homemade rustic Christmas ornaments is to rust the tin cans. Once the cans are empty, you can rust them quickly using the method in this video tutorial. You can also work with tin cans that are not rusted, but they will be much stiffer and harder to flatten.

Step 2 – Cut and Flatten Cans
To repair the rusted cans, I used my tin snips to cut down the side and across the bottom of the can. Next, I cut off the bottom and the reinforced top rim. Once this is completed, the piece that is left can be flattened by hand. Be sure to wear gloves as the metal edges can be sharp. Further, flatten the metal using a hammer on a hard surface.


Step 3 – Use Templates to Cut Shapes
Secure the paper template to the piece of metal using the clothespins and carefully cut around the paper shape using the tin snips.


Step 4 – Mark and Drill Holes
To make the holes in my handmade rustic Christmas ornaments, I used a tool called a center punch to mark the spot where the hole would go, and then with a cordless drill, I made a hole in each piece.

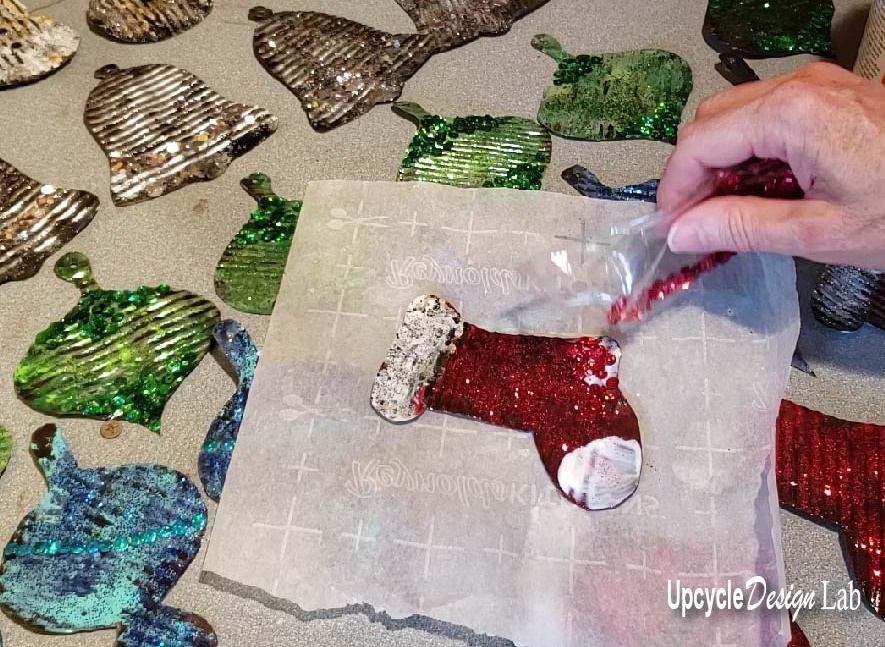
Step 5 – Decorate
My tip for this step is to have fun. I used some acrylic paints, glitter, and sequins. I found most of these items at the Dollar Tree. You could also use fabric scraps, air dry clay, twigs, beads, craft paper, etc. I recommend using Mod Podge to apply your decorations as well as to seal and finish the ornament. It even rounds off some of the sharp edges of the metal.


A while back, I made a comparison review on Mod Podge vs. Elmer’s glue. At the time, I would have sworn that Elmer’s glue was just as suitable for most applications. However, if you want to know why my testing converted me to a Mod Podge loyalist, you can find out more here.
Step 6 – Add Cording
The last step once your shapes are decorated and dry is to attach the cord and hang them up. Unless it is the middle of August oh who am I kidding I don’t follow those rules. If you want to go out and throw up some Christmas decorations right now.

That’s what I did.

If you enjoyed this project be sure to check out some of my other recycled tin can projects.
- Whimsical Alice in Wonderland Tin Can Yard Art
- Tin Can Patriotic Door Hanger
- Tin Can Table Top (don’t be startled this link will take you to my old blog)
- Tin Can Picture Frame
Advertising Disclosure: Upcycle Design Lab may be compensated in exchange for featured placement of certain sponsored products and services or your clicking on links posted on this website.


These are so much fun! LOVE, love, love the rustic boho primitive feel. You did a nice job w/ the colors you chose, plus the glitter…..just an all-around cute look, and for such very little cost! Great craft! Blessings…. 🙂
Thanks so much Julie. I think this project turned me into a glitter fan. 🙂