Upcycled Aluminum Cans – Beaded Jewelry
Update: This jewelry is made from beads made from beer and soda cans. Learn to make the beads in the video below.
Hello, I hope you are feeling cheery and well.
We are experiencing a cold snap here in Colorado, with high temperatures in the single digits. Even so, I have springtime on my mind, and I am gearing up for a craft show at the end of April. This will only be my second craft show, and I expect it will be quite different from the first craft show I attended in Santa Fe last year.
If you already know about that trip, then you know it made a lot of items from tin cans, and while I still have quite a lot of inventory, I also have crafters A.D.D., so I am now working on totally new items to sell at my next craft show.
I am sure I will end up taking some of the tin can items, but this space will be quite a bit smaller than the booth I had in New Mexico. On the bright side, it is also a lot more affordable and local, so the stakes aren’t nearly as high.
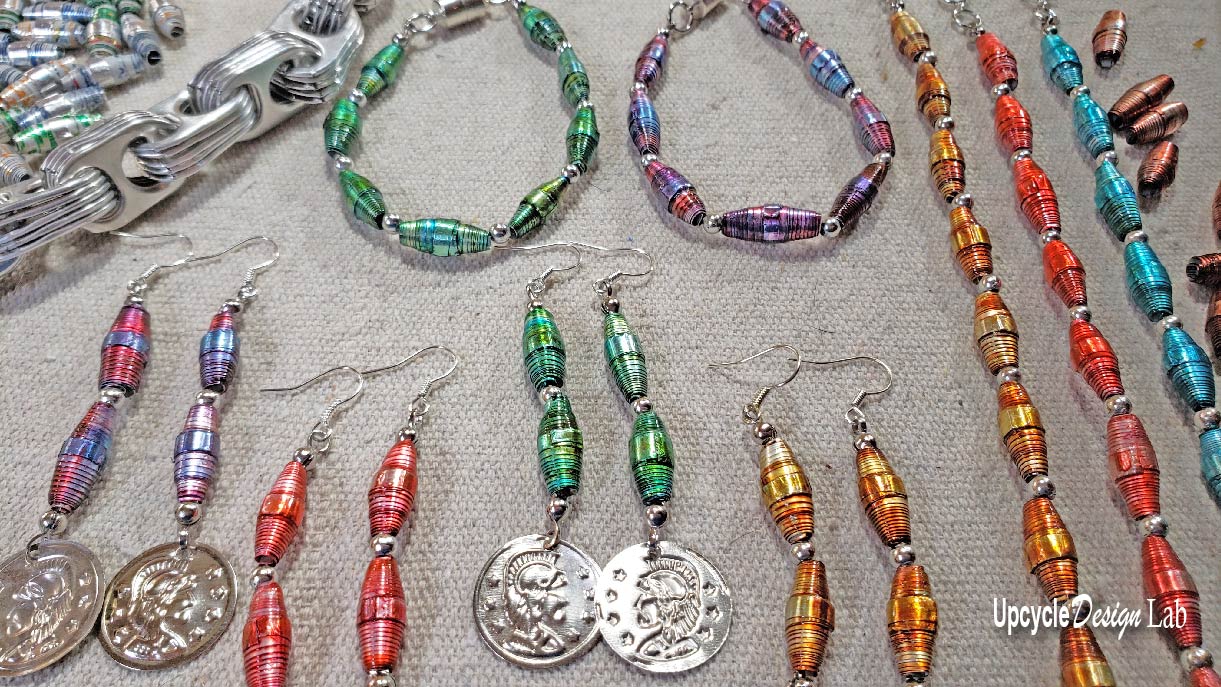
In my last post, I made some beads from aluminum cans, and in this post, I will share some jewelry pieces from those beads.
You can check out all the pieces in the video below.
Anyway, this bracelet and earring set is my favorite, and I think I will try to make more to sell at my upcoming craft show. So let me know what you think.
Upcycled Aluminum Jewelry Set – Bracelet and Earrings
Step 1 – Gather Supplies

Advertising Disclosure: Upcycle Design Lab may be compensated in exchange for featured placement of certain sponsored products and services or your clicking on links posted on this website.
To make one 7 1/2 inch bracelet and one pair of earrings, you need the following.
- 12 aluminum can beads (see link for bead tutorial)
- 9 silver spacer beads
- 6 crimp beads
- 6 9mm silver bead covers
- 2 silver jump rings
- 1 magnetic jewelry clasp
- 12 inches of beading elastic
- 2 silver earring hooks
- needle nose pliers
- round jewelry pliers
- cutting pliers
- alcohol ink
- Mod Podge high gloss
- Small scissors
Step 2 Secure Ends
To make one bracelet cut approximately 9 inches of beading elastic and two pieces 4 inches long for the earrings.
To secure one end of each piece, slide one 9mm bead cover and one crimp bead on each piece of bead elastic. Then use the needle-nose pliers to secure the crimp bead close to one end of the cord.

Trim the excess cord and slide the bead cover over the crimp bead.

The last step to secure the end is to close the bead cover using the needle-nose pliers.

Step 3 – String Bracelet and Earrings
I used a simple alternating pattern for my bracelet and earrings. Add one aluminum can bead and a spacer bead until all the beads are strung on the elastic. I used eight rolled aluminum can beads and seven silver spacer beads for the bracelet. The earrings used two rolled beads and one spacer bead each.

Step 4 – Secure Beads
To secure the beads in place, I used another clamshell bead cover and crimp bead, this time making sure to hold the beads tight on the cord before crimping the bead and closing the clamshell. Repeat this process for all three pieces.

Step 5 – Finishing
To complete the bracelet, I used the round-tipped pliers to close the ring tip of the clamshell bead cover and then attached my magnetic jewelry clasp to both ends using a jump ring.

To complete the earrings, I attached the earring hooks to the hook on the bead cover before using the round jewelry pliers to close it. Then I repeated the process on the opposite end, this time adding a decorative coin medallion.

I love how shiny and colorful they turned out. For more details, check out the video tutorial.
If you are interested, you can find all my bead templates below in SVG format if you would like to use them with your cutting machine. If you would like more information on cutting aluminum cans with a Cricut check out this link.
Thanks for checking out my project.
Happy Upcycling,
Cindy
Advertising Disclosure: Upcycle Design Lab may be compensated in exchange for featured placement of certain sponsored products and services or your clicking on links posted on this website.

Use the photo below to navigate the templates


